
Put down that mulled wine immediately. We are making bookcloth today.

Happy Holidays! Here, put on this apron and stop drinking. We’ve got work to do. We’re making our own bookcloth today, so tell your family to get lost and let’s get started.
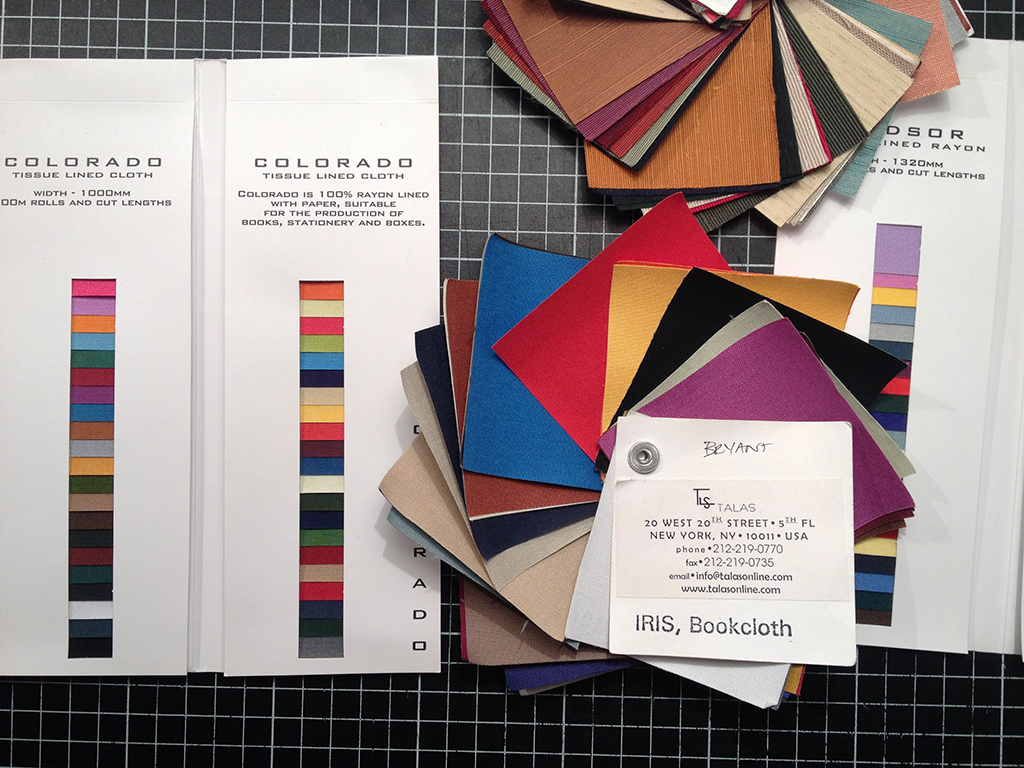
samples of colorado bookcloth from Ratchford’s (UK) and Iris bookcloth from Talas (USA)
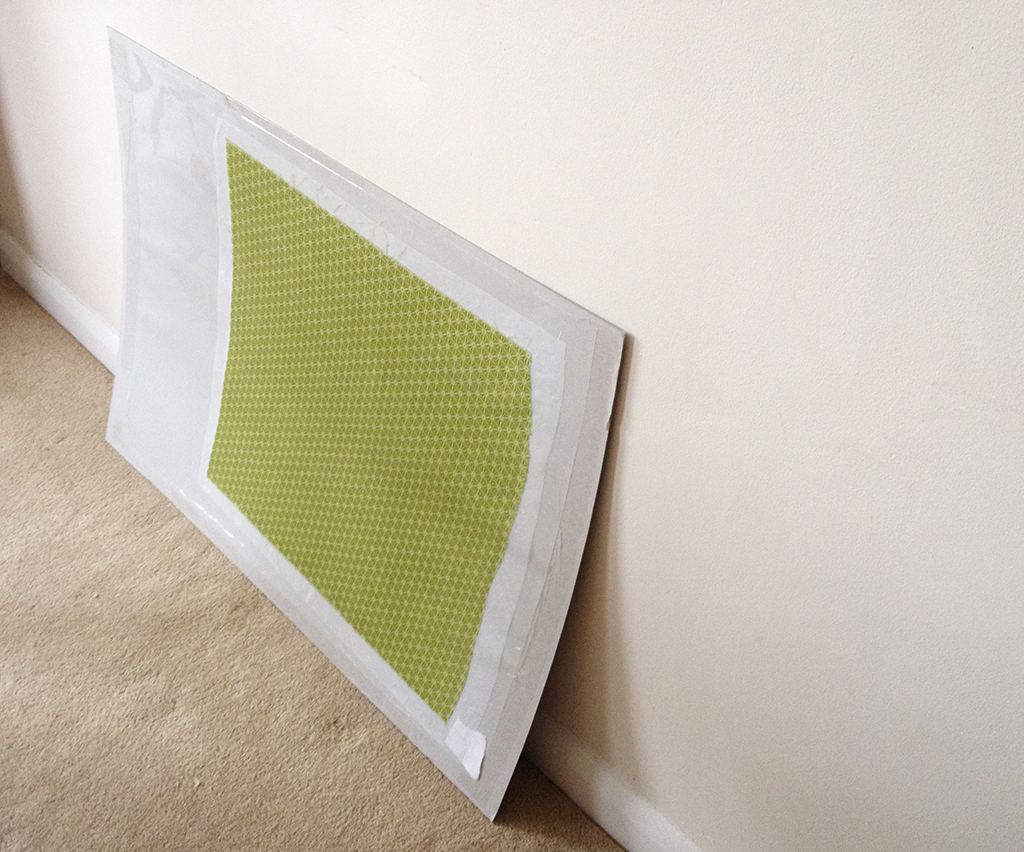
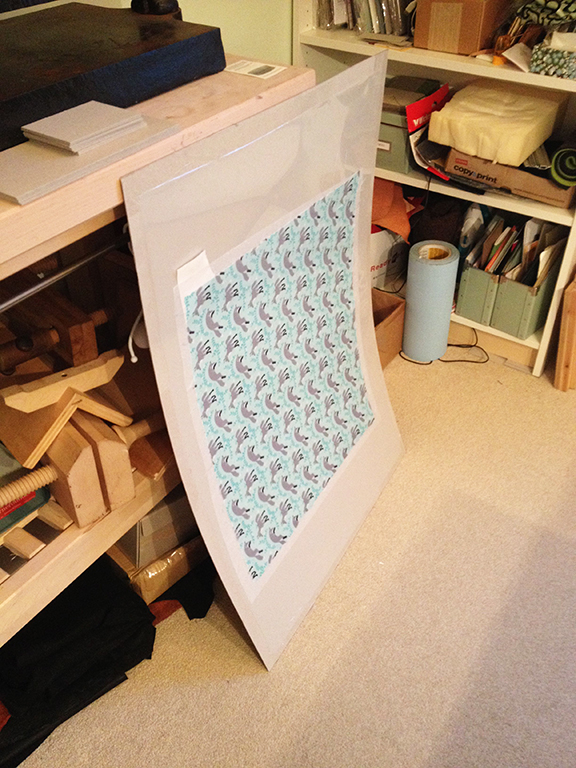
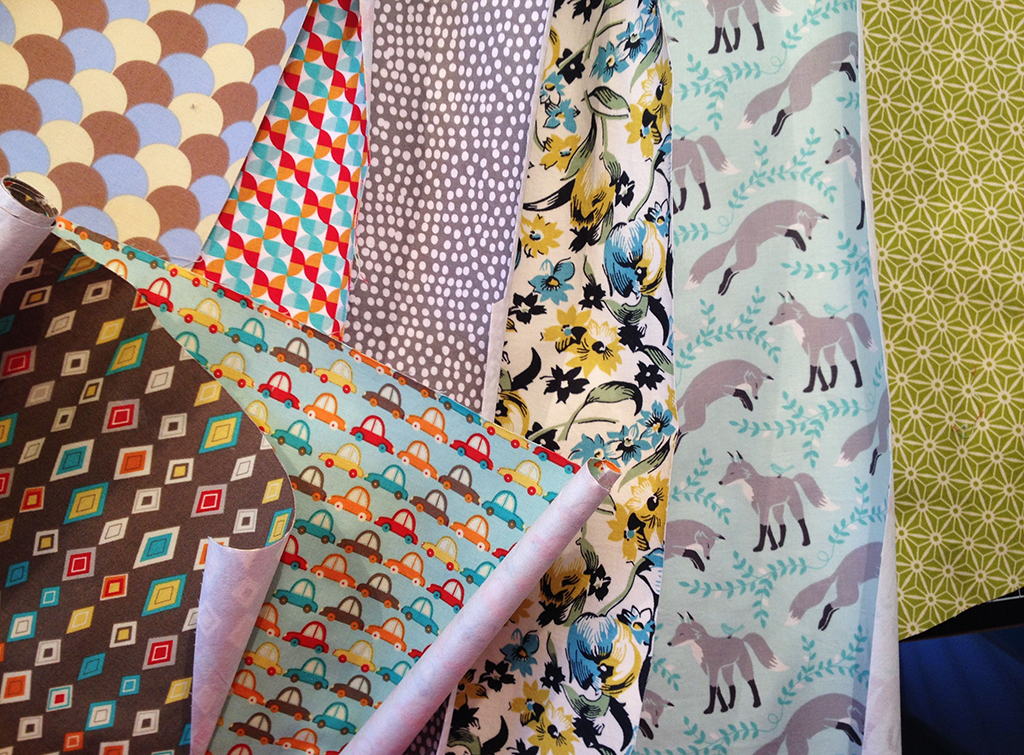
Bookcloth is a basic bookbinding material made of cloth backed with paper. The paper backing is what protects the cloth from the adhesives you use when you glue or paste the bookcloth to boards. Commercial bookcloth comes in many colors and textures, and I love digging through sample books to find just the right shade for one of my printed editions. But when I am making blank books and empty boxes, I like to make my own bookcloth out of patterned cloth. Why? Because it is fun. And when I’m finished I have something that looks like this:

I learned to make bookcloth at the University of Alabama. Similar instructions for backing cloth can be found in in Kojiro Ikegami’s excellent Japanese Bookbinding on pages 27-28. Do you have a copy? No? Get one. It is an amazing book.
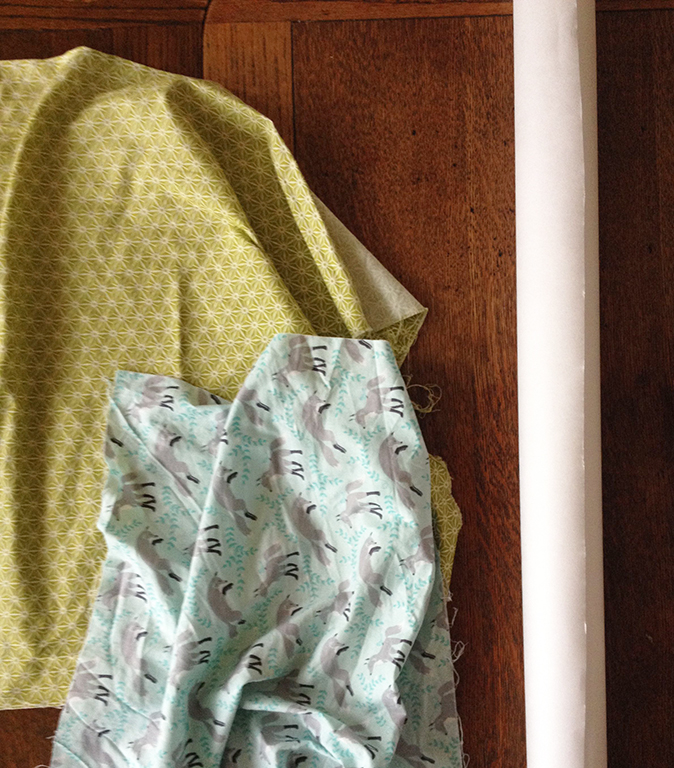
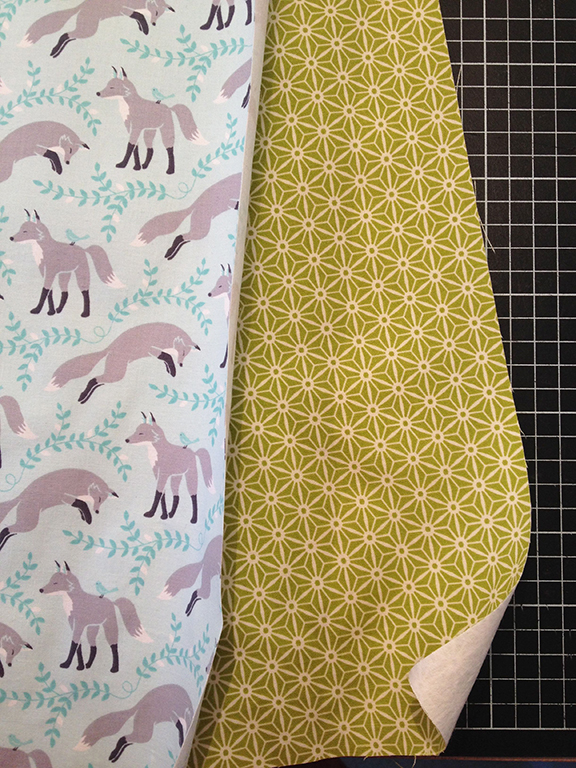
So, first order of business, I went to my neighborhood sewing store the other day and picked out a couple of 100% cotton fat quarters. Fat quarters are a great size for book cloth making, and are readily available for cheap. If you are cutting cloth that you already have, I would start with something around 18″ square or a little bit larger. You can make larger sheets of bookcloth, but I advise starting with this size and moving up if you feel comfortable.
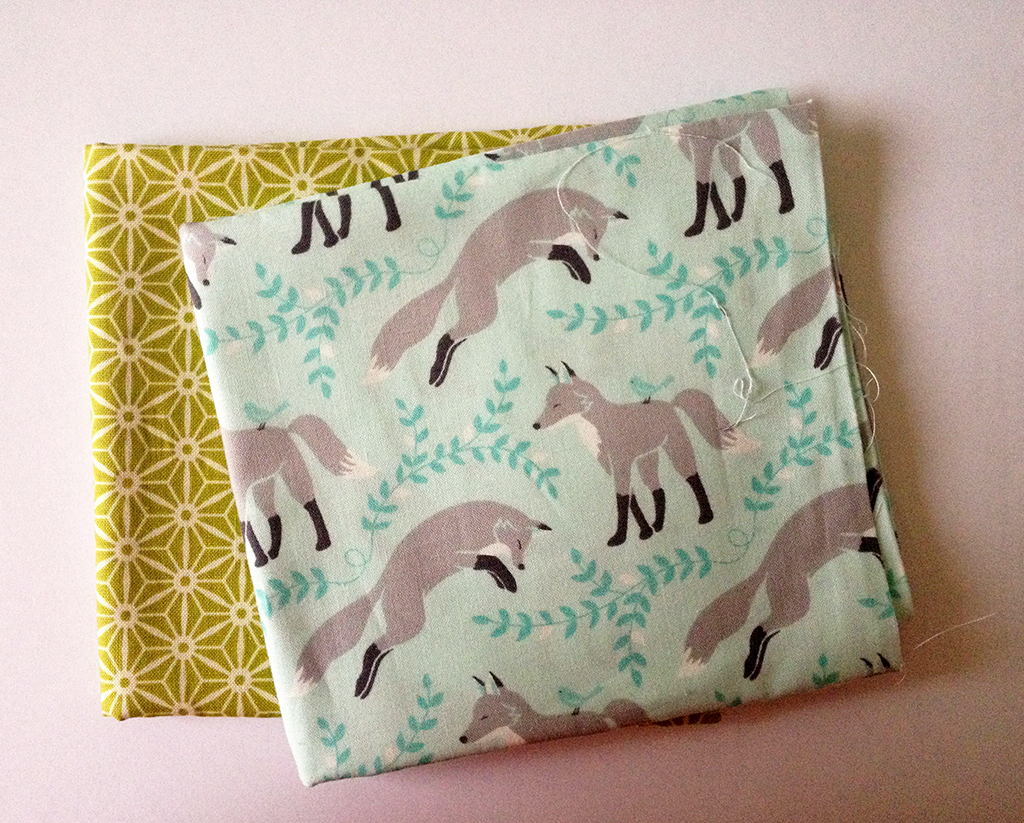
a fat quarter covered in leaping foxes works best
To back this cloth with paper, I am going to use paste, an adhesive made from starch that is easy to cook up in the kitchen. (I know, I know, I know, there is a quick and dirty iron-on thing. Please. We are trying to be serious today.) Wheat starch is easy to find in cheerful packaging at an Asian grocery store. Here is mine:
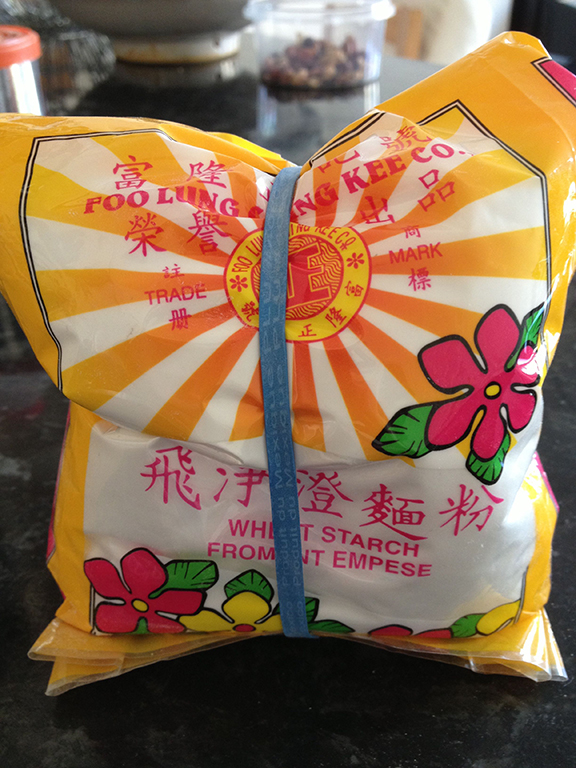
taaaa daaaaa!
MAKING PASTE
There are like a hundred and twelve paste recipes out there. This is the one I use, but there are lots of people out there making lots of paste and it’s all working out ok for everyone. So if you already make paste in your own way, just make some paste and skip this part.
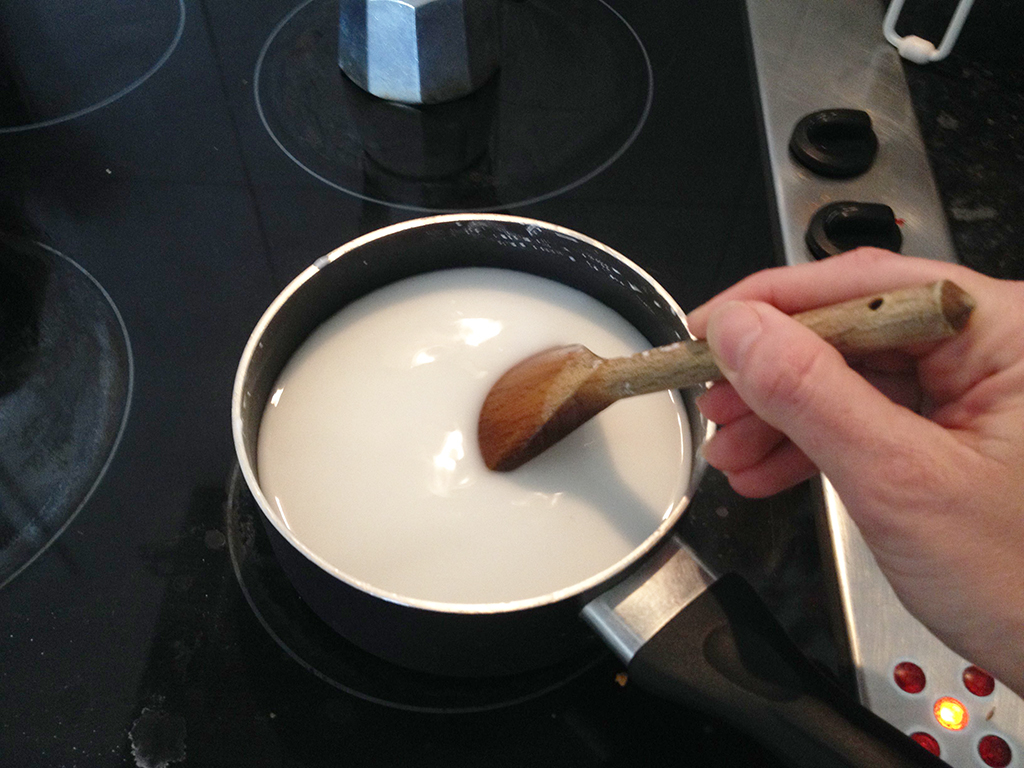
I make my paste in a 1 part wheat starch, 5 parts water ratio. Today that shakes out to 100ml wheat starch (roughly a quarter cup) to 500 ml water.

Throw the starch and the water into your saucepan and let it sit and soak for half an hour or so. When half an hour has passed, start stirring over low-medium heat. If your hob runs hot, keep it to low. Do you like stirring? I hope so, because you are not going to stop for thirty or forty minutes.
Some people make paste in the microwave. They don’t have to stir, but then they don’t get forty minutes of guilt-free Battlestar Gallactica. (I know that computer looks pretty precarious, but it is on the verge of collapse and I am simply giving it the opportunity to go out on its own terms.)

don’t worry about the laptop
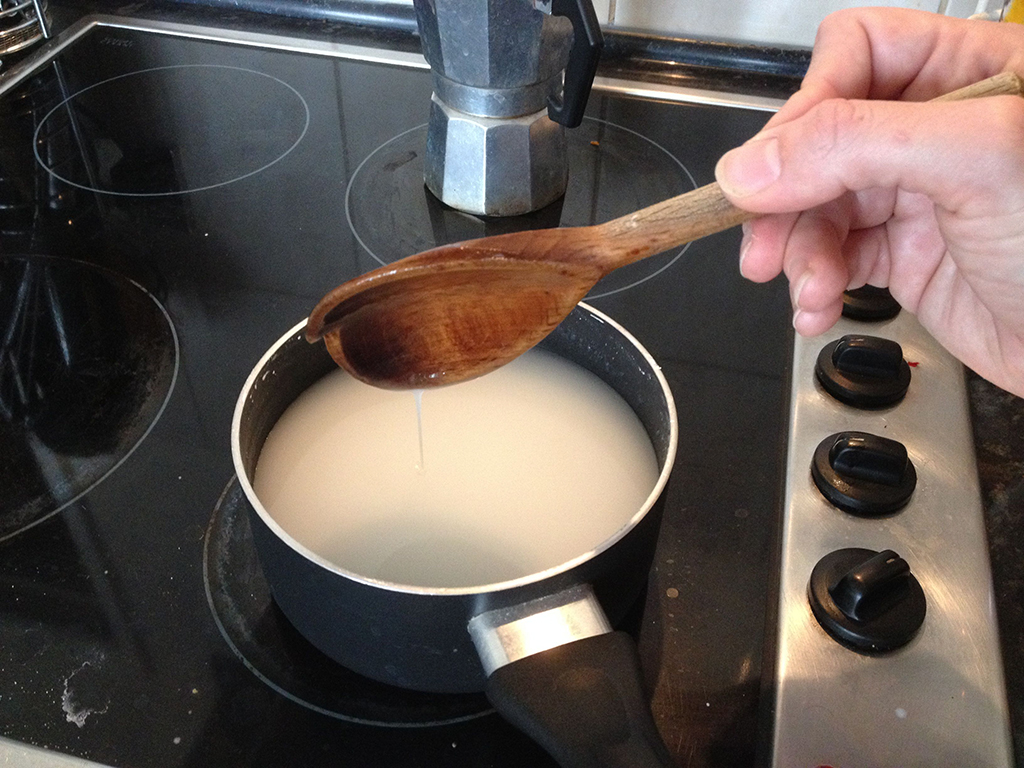
Your paste will slowly start to thicken. It will stop looking like milk and start looking more translucent.
Soon it will start to look like gooey ooze.
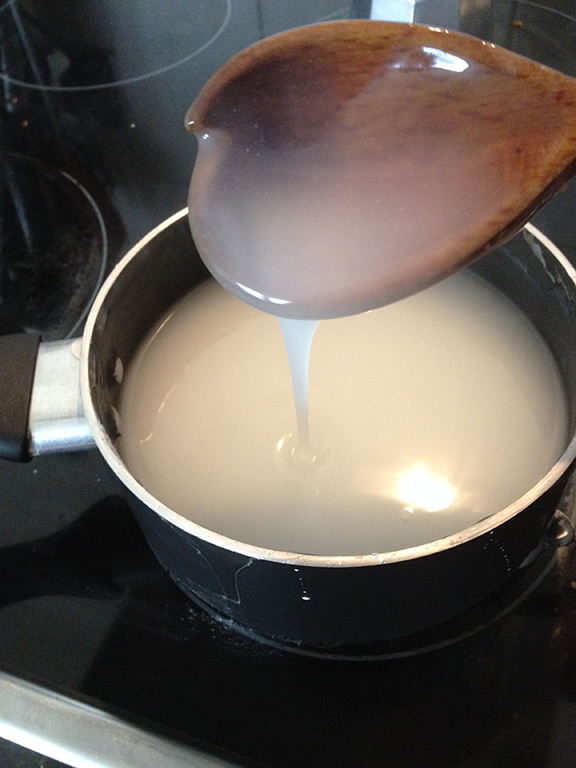
yummmm ectoplasm
Keep stirring until you start to see tiny little microbubbles. Like these:
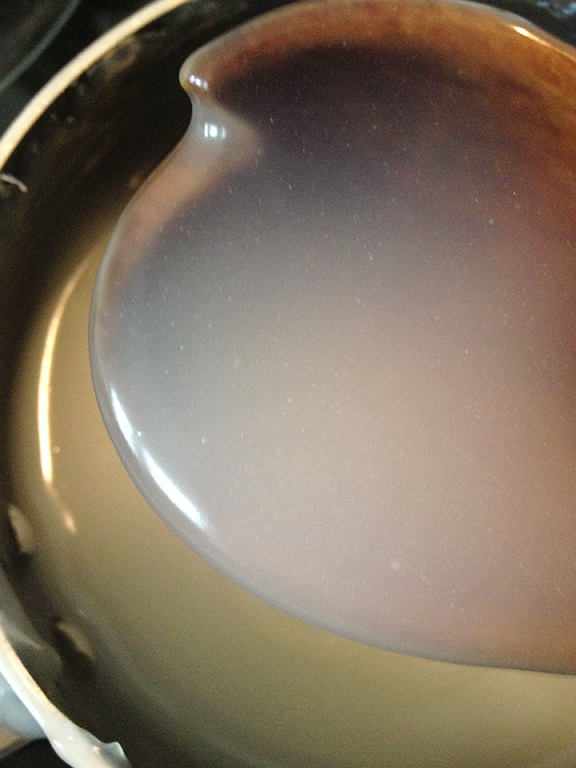
When the microbubbles arrive, keep stirring for about five minutes, and then pour your paste into a container to cool.
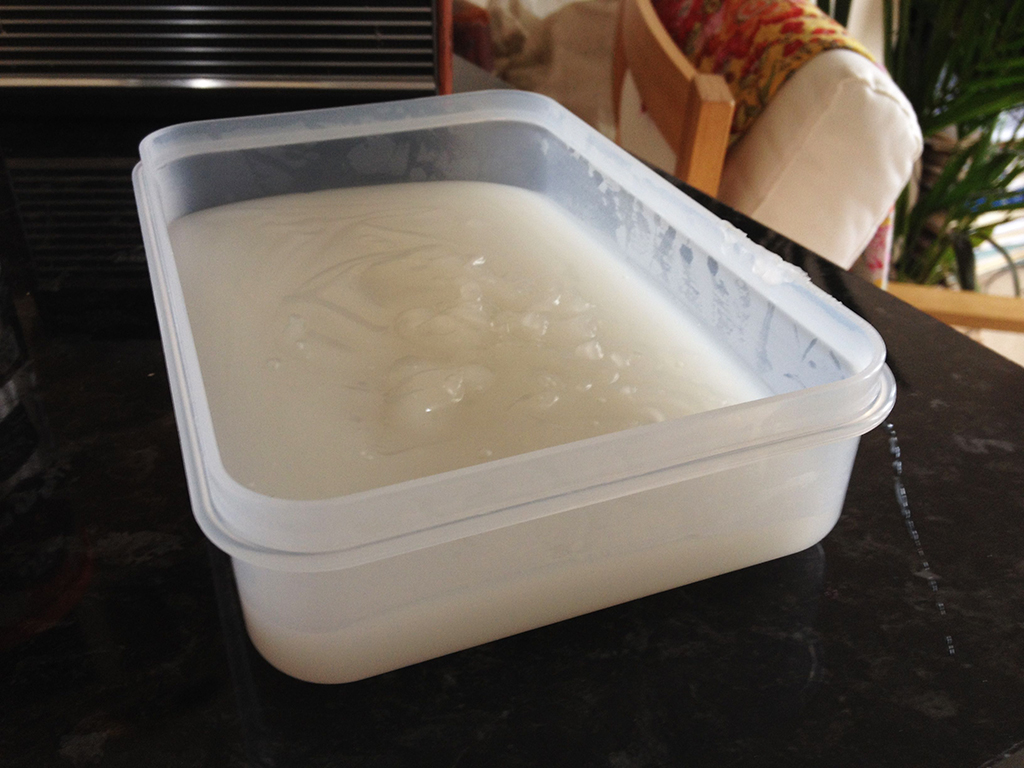
After it has cooled down, you can pour some water over the top and store it in the fridge. If you are not going to use it right away, change the water every day. WARNING: if you do not use this paste within a week, it will start to smell like sewage. People will not want to come to your house for holiday parties, neighbors will start to complain about you to your landlord or the police, and you will embark on a surprisingly abrupt descent into lonely smelliness. If this happens to you, flush your paste down the toilet immediately. Don’t look back.
Once the paste has cooled, let’s get serious.
MATERIALS AND TOOLS YOU’LL NEED
Cloth
I have washed my 100% cotton fat quarters in the washing machine to eliminate all those new-cloth chemicals.
Japanese Paper
I am using an unidentified roll of Japanese paper that I found on sale earlier this year at Falkiners. Japanese paper (or much of it) is made from the kozo plant. The long kozo fibers make it particularly strong. There are countless varieties of Japanese paper. I am not picky about what kind I use. I am looking for medium weight, around 50 gsm or a bit less. Maybe something in this neighborhood. I don’t want anything tissue thin because it is hard to work with. Thick paper yields thick book cloth. You can order sample books of Japanese paper, or visit an art supply store with a good paper section. This paper does NOT have to be of excruciatingly high quality.
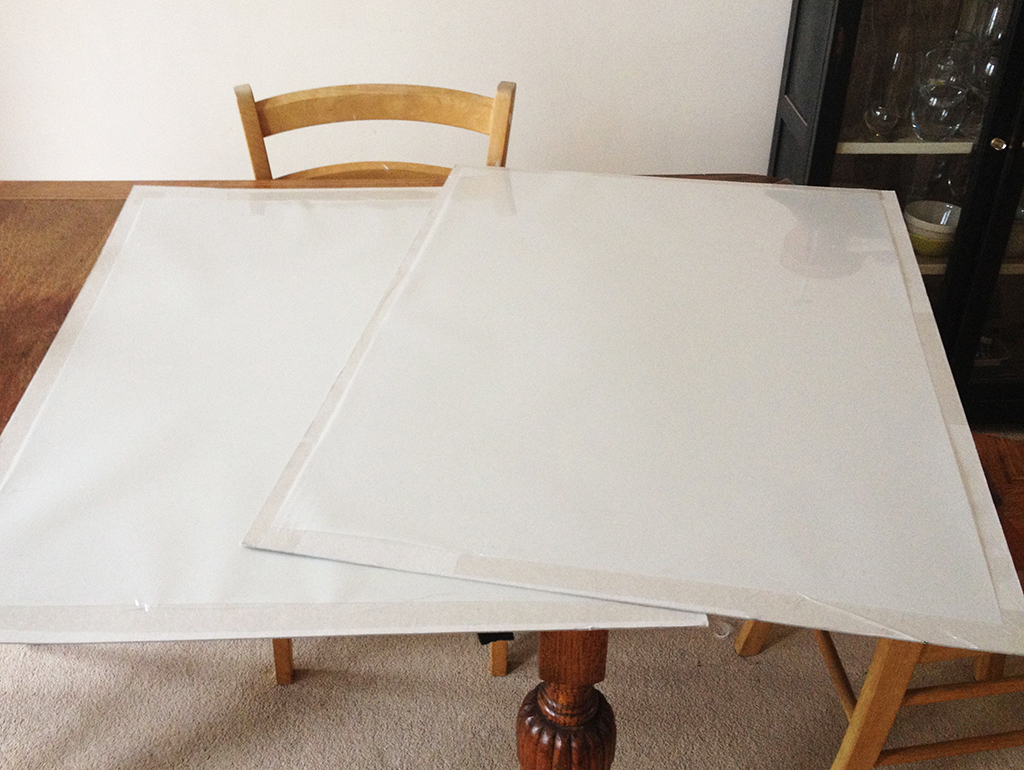
Large Boards
You’ll need at least two boards a few inches larger than your cloth in all directions. I like to use plexi (that’s perspex to you, UK) but large sheets of MDF or high quality, smooth plywood will work as well. In the absence of these options (as I am today) I use a thick acetate or mylar taped to sheets of binders board. I am in between sheets of plexi since my move, but am hoping to upgrade again soon.
You’ll also need a stipple brush (not critical, but very useful,) a large glue brush, a dishcloth or two, a strainer, a spray bottle of water, your paste, and a bowl. You might also want a dowel or long ruler, but this is not essential.
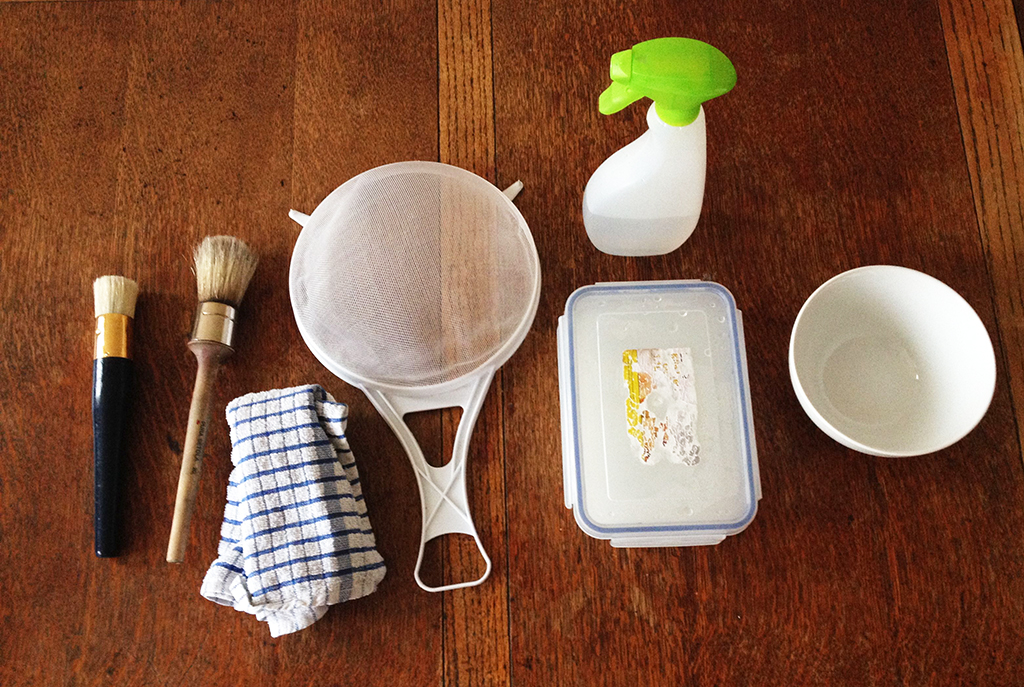
Here are some things I have that you should also have.
STRAINING YOUR PASTE
I begin by straining my paste. (And here you thought I was finished going on and on about paste.) Straining the paste eliminates the lumps that can cause trouble for you later. If you are lazy you can do this in a blender.
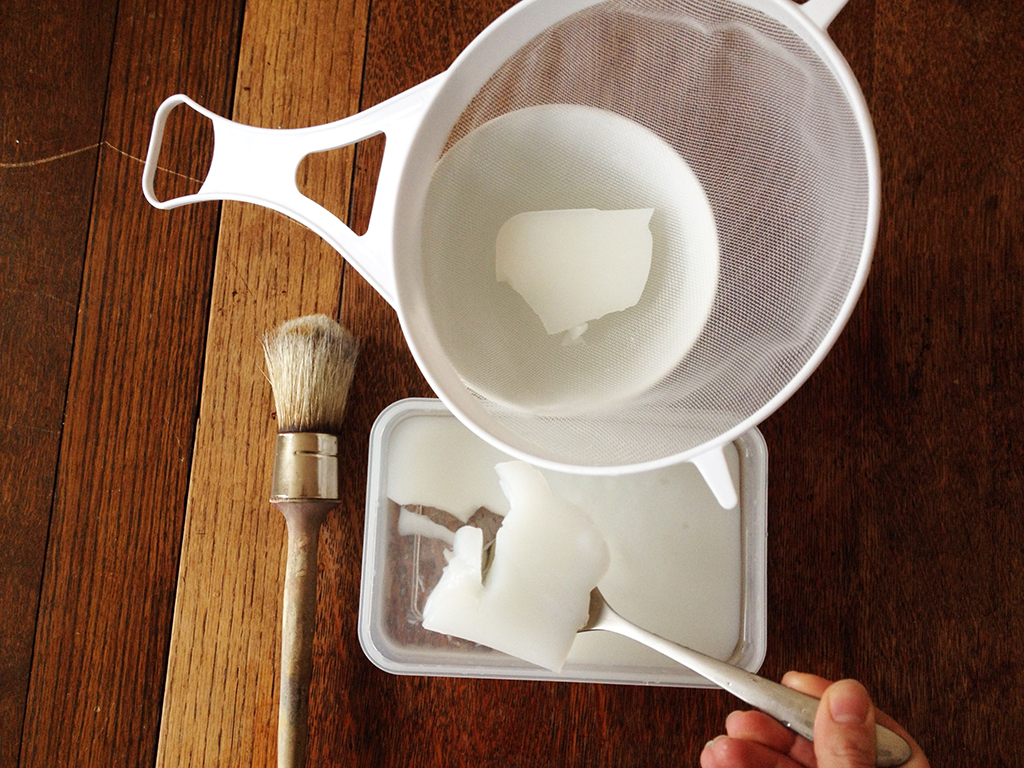
I scoop a good bit of paste into my strainer and start to work it through and into the bowl using my large brush. I am using about half of what I made.
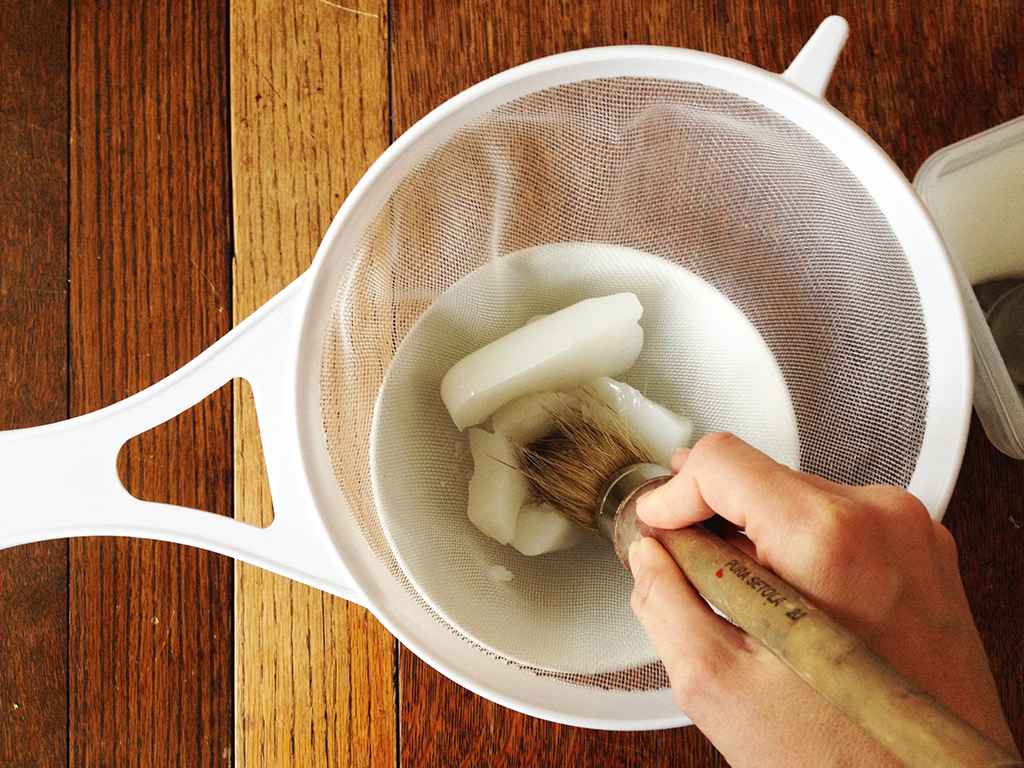
smoosh smoosh smoosh.

When I am done, I need to add a small amount of water and work the paste with my brush.
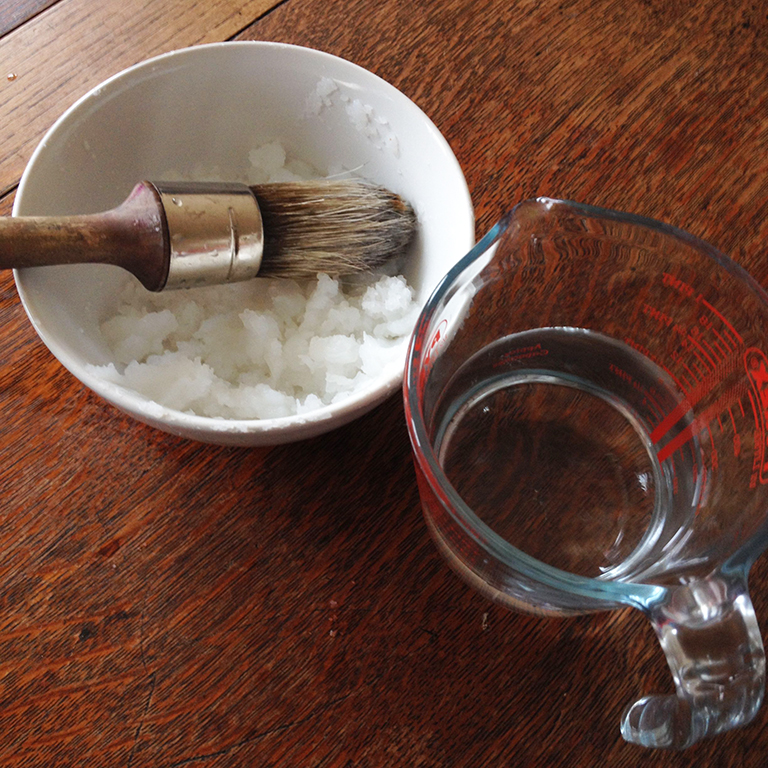
I like to re-strain the paste to help me get rid of all of those little lumps and bumps.
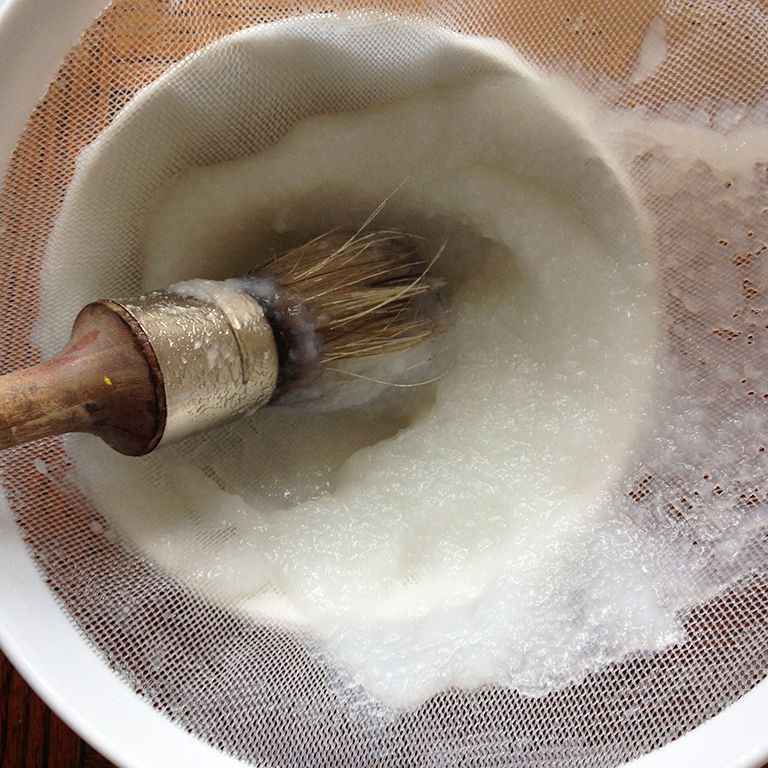
I want to work my paste and add small splashes of water until it is nice and silky smooth and roughly the consistency of a loose hair conditioner. I am patient. (This smooth, strained paste will keep for a day, but not much longer. Take heed.)
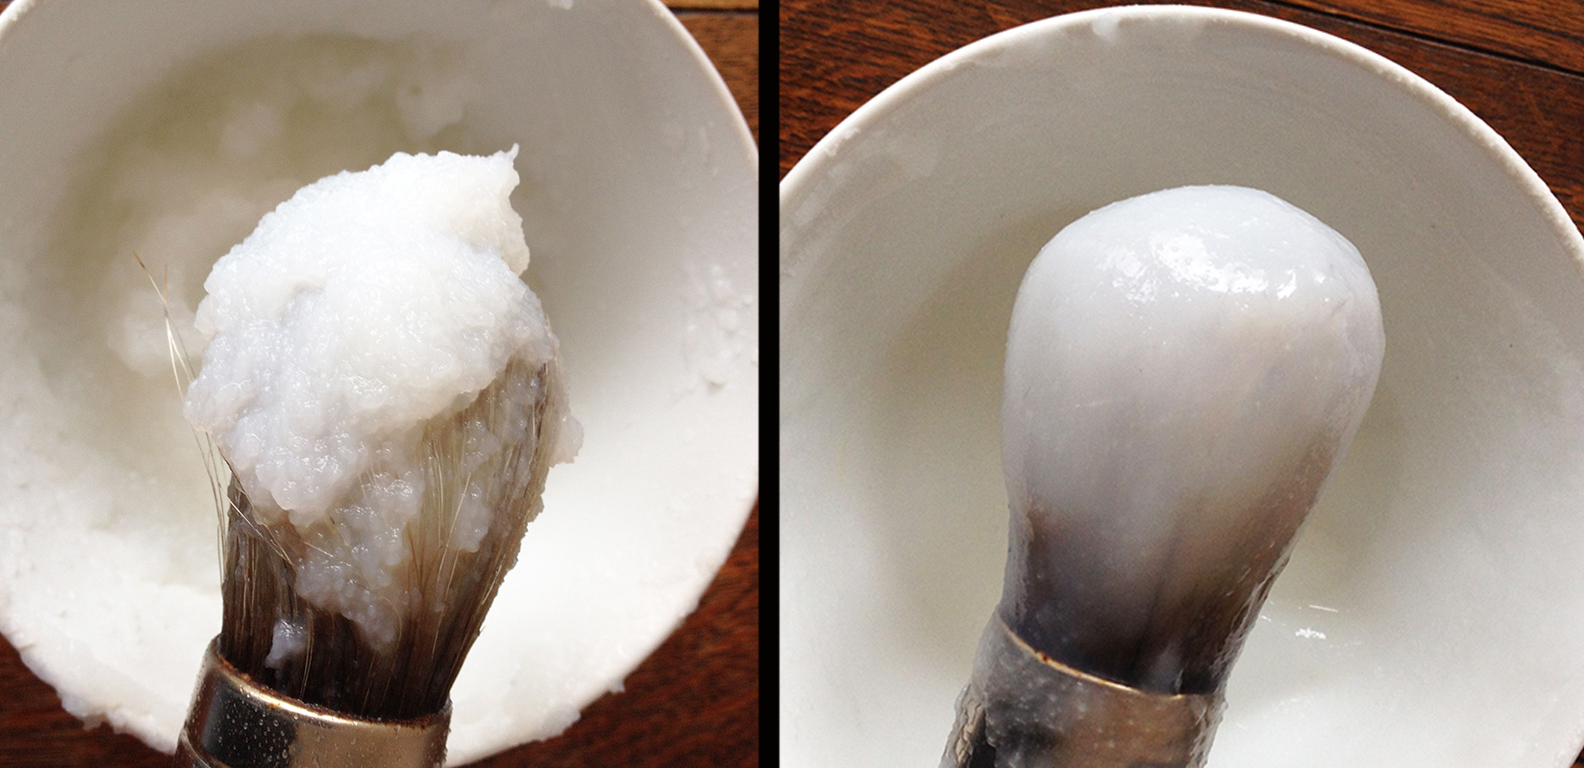
Lumpy paste is for jerks. Keep stirring until it is nice and smooth.
BACKING THE CLOTH
We’re ready now to back the cloth. Your cloth should be stretchy in one direction and not stretchy in the other direction. This non-stretchy direction is the warp, and should be parallel with the grain of your paper. (The stretchy direction is called the weft and a recent google search told me that the weft is also called the woof, which is ridiculous.)
watch out for the woof.
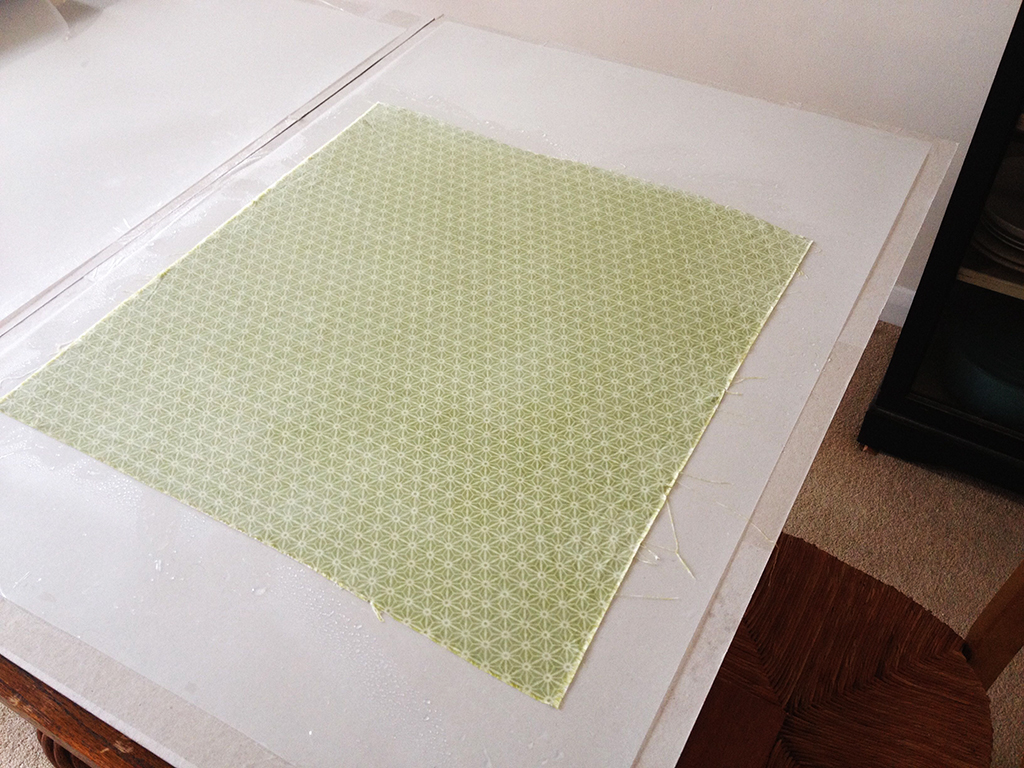
Lay your cloth on top of your paper so that the warp is aligned with the grain of the paper.
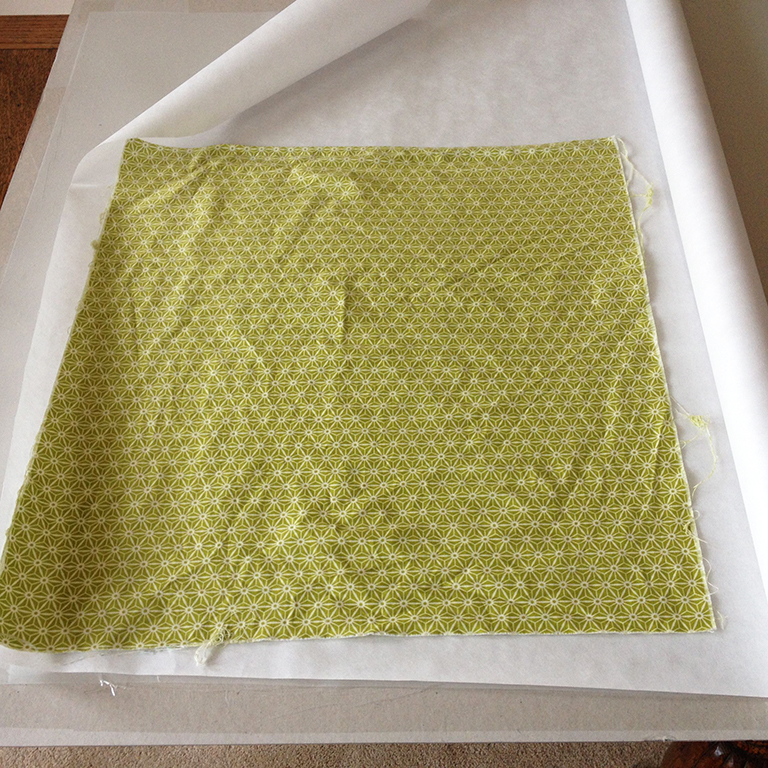
Cut a piece of paper that is larger in all directions by at least an inch.
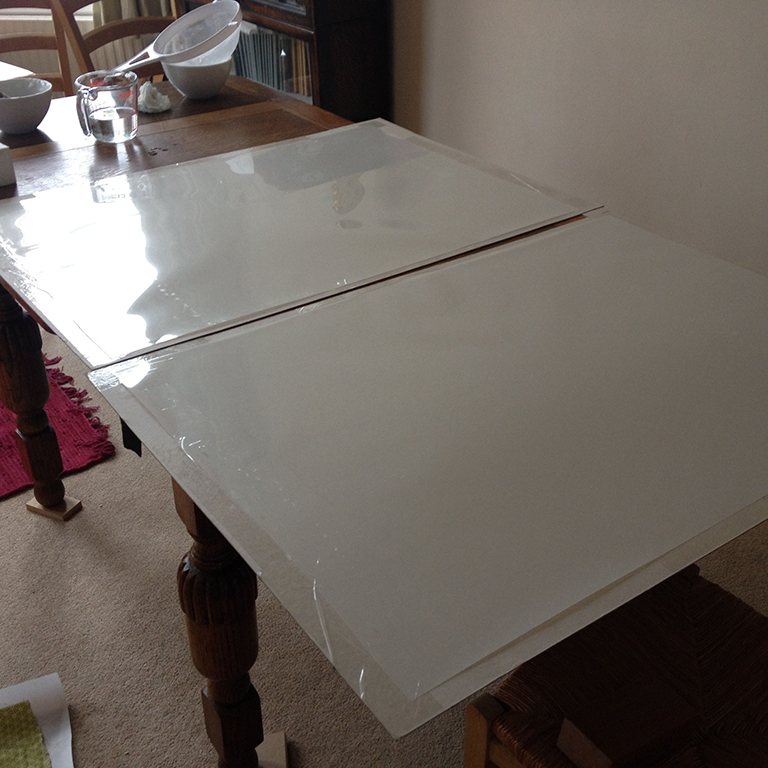
Lay out your boards. I am doing this on my dining room table so that I’ve got space to move around.
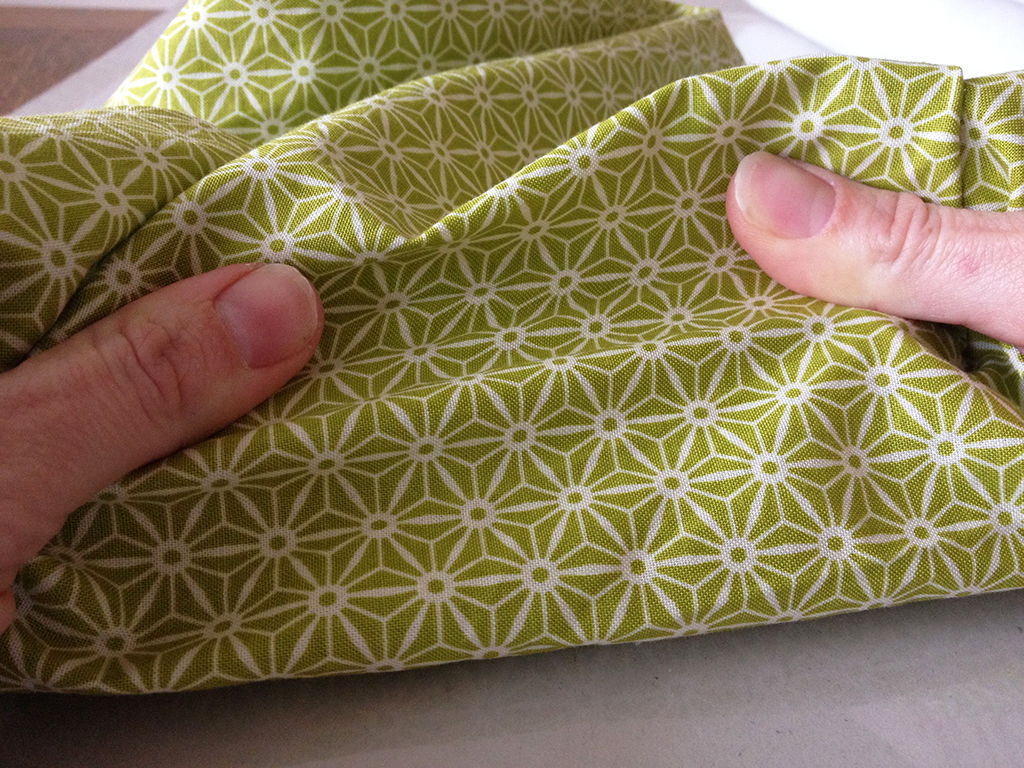
Lay your cloth face down on one of the boards. Spritz it with water.
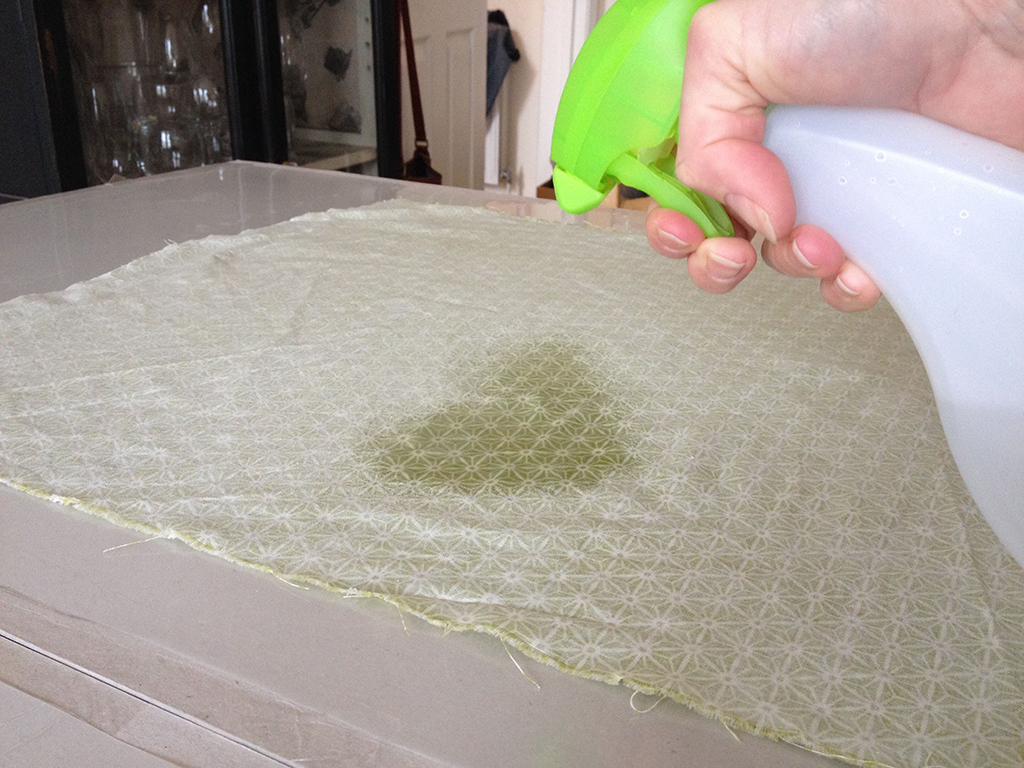
Use your hands to manipulate the dampened cloth so that it is lying flat and has no wrinkles.
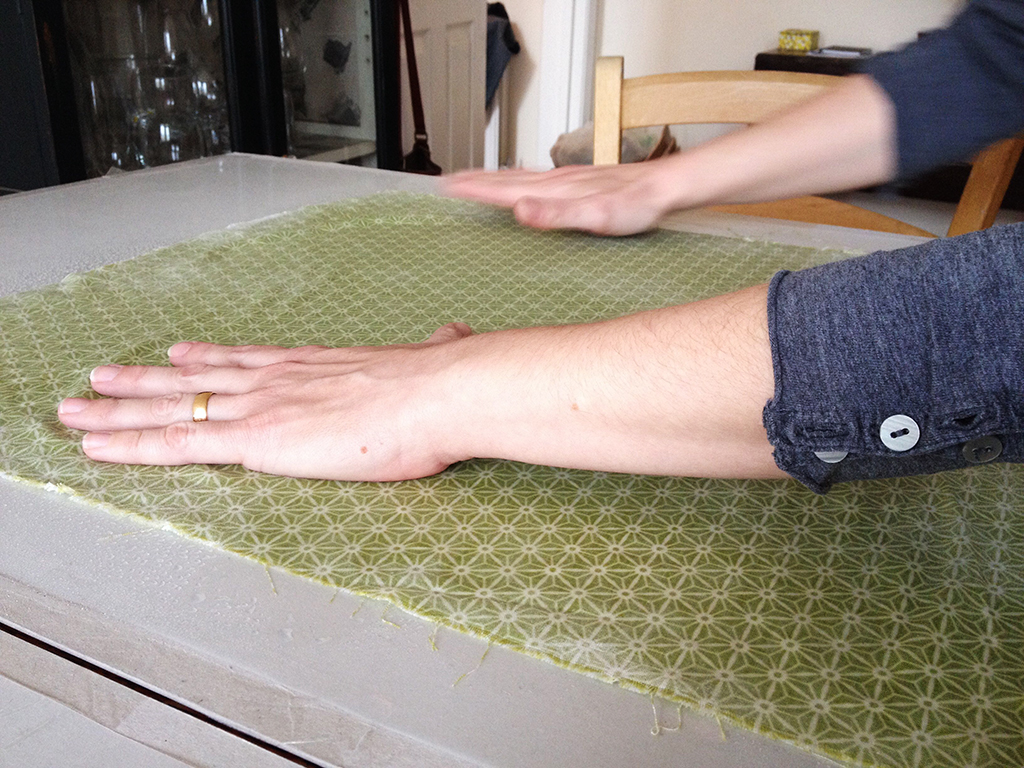
If your cloth has a geometric pattern, beware stretching the cloth and warping the pattern.
Lay your Japanese paper on the other board. If there is a rough side and a smooth side to your paper, put the rough side up. Remember your grain direction here and lay the paper with the grain going the same way as the warp. Now paste out the paper with your large brush, starting in the middle and covering the entire sheet with large strokes to the outside. Make sure you get coverage everywhere. The entire surface should be slick.

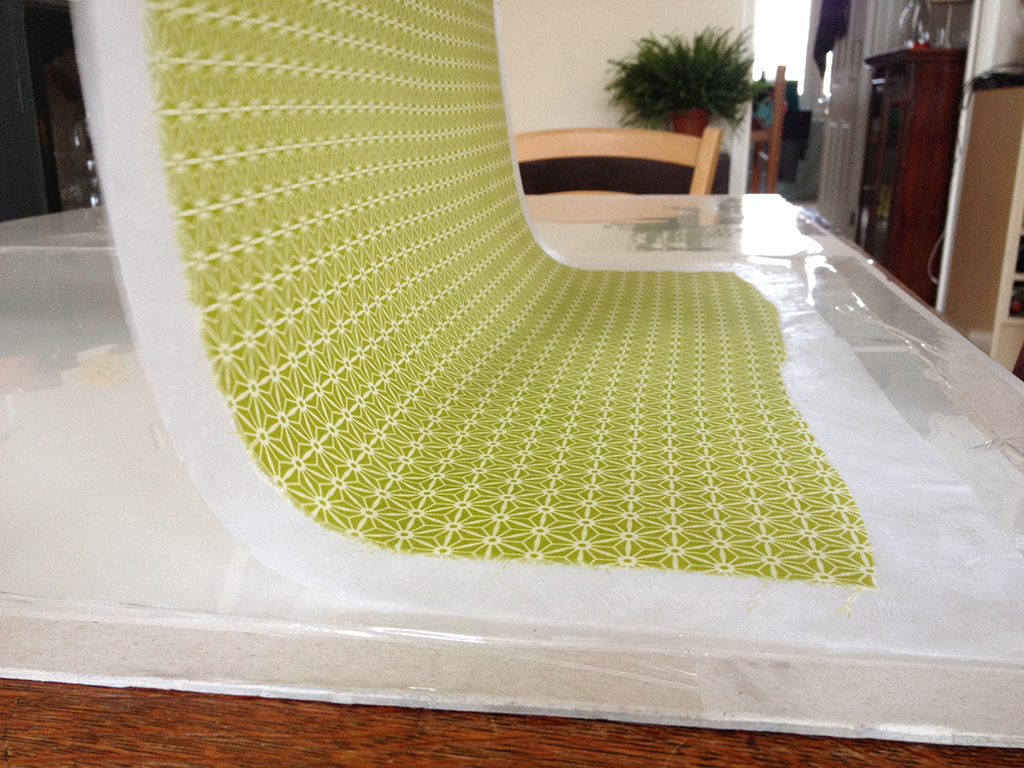
Using a dowel, a long ruler, or a spare bit of wood, pick up the pasted out paper. You can also do this with your hands, which is what I usually do.
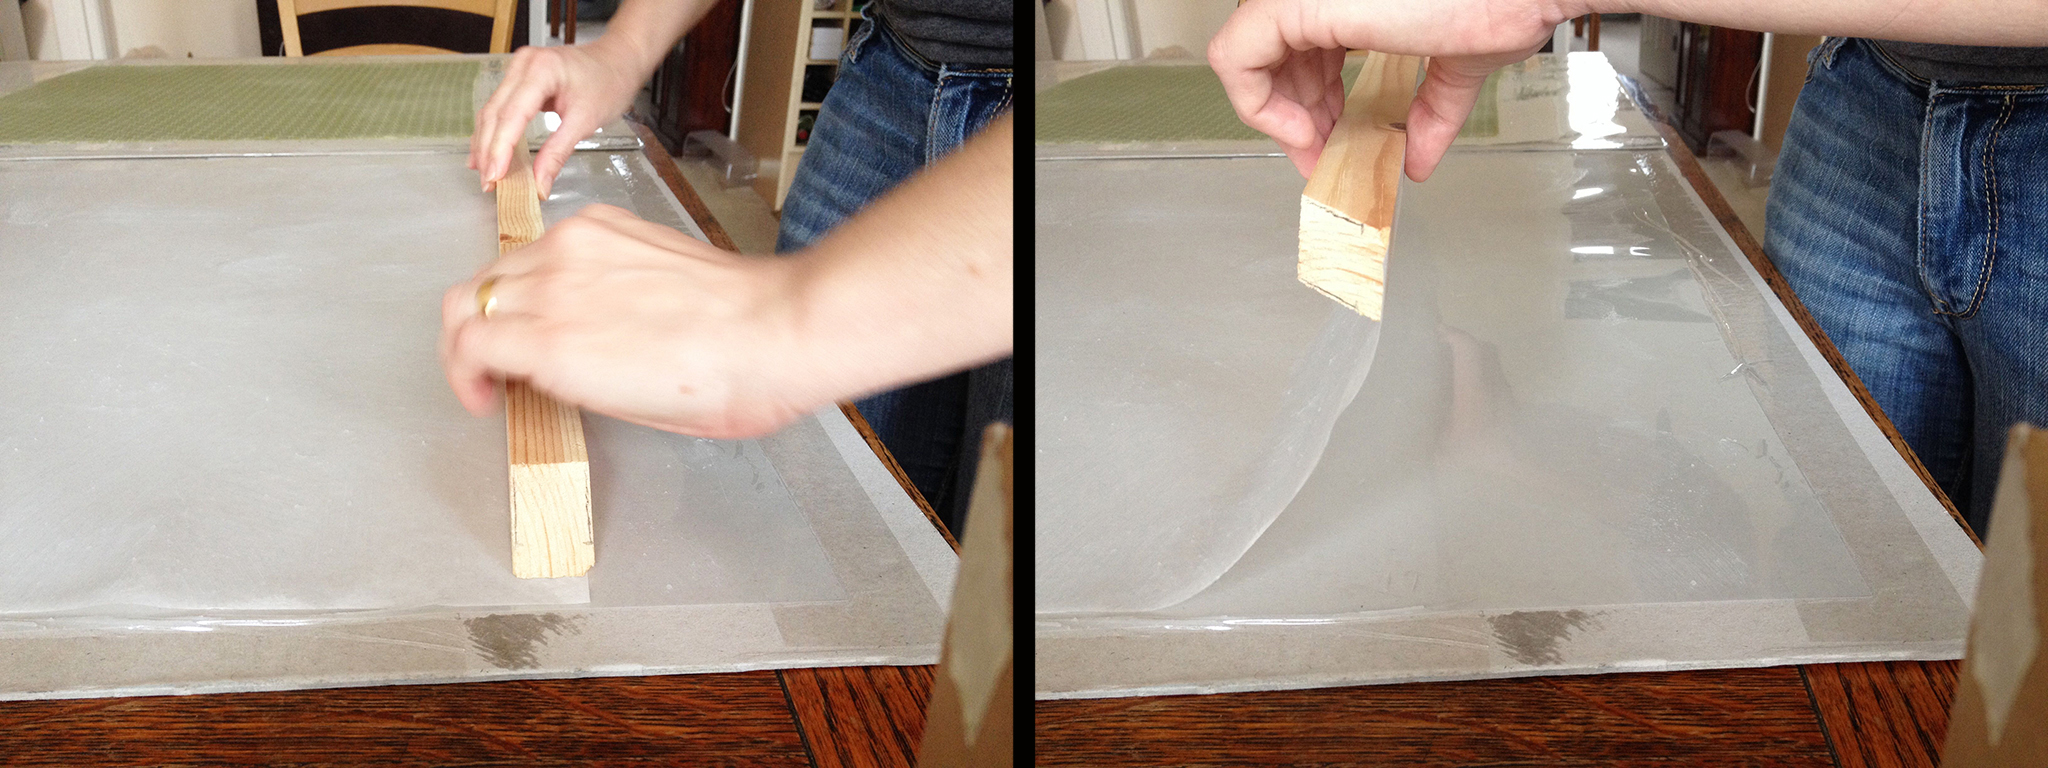
Look, I’ve abandoned the wood and put on an apron all of a sudden. Anyway, carefully drape the paper, paste-side down, onto the cloth. Paste is very slow drying, so you have time to reposition. This is much easier with two people, but if you are on your own, just be patient. Don’t be afraid to pick the paper up and try again. You want the paper to extend beyond the cloth without any big air bubbles or wrinkles.
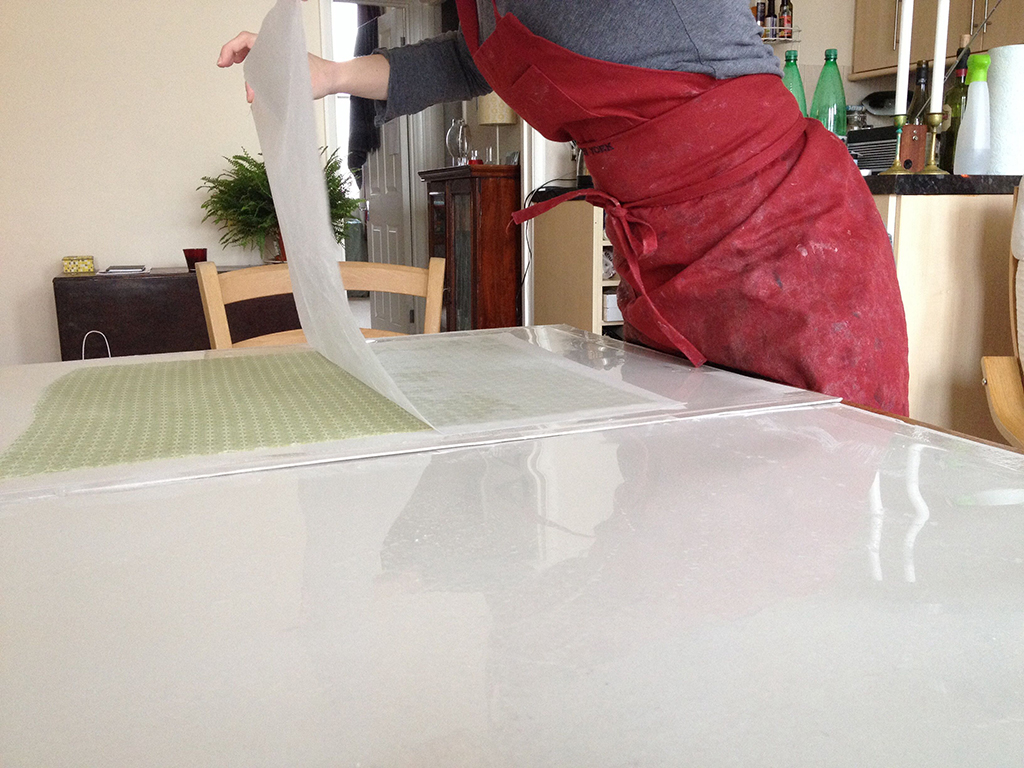
How’d I get that apron on so fast?
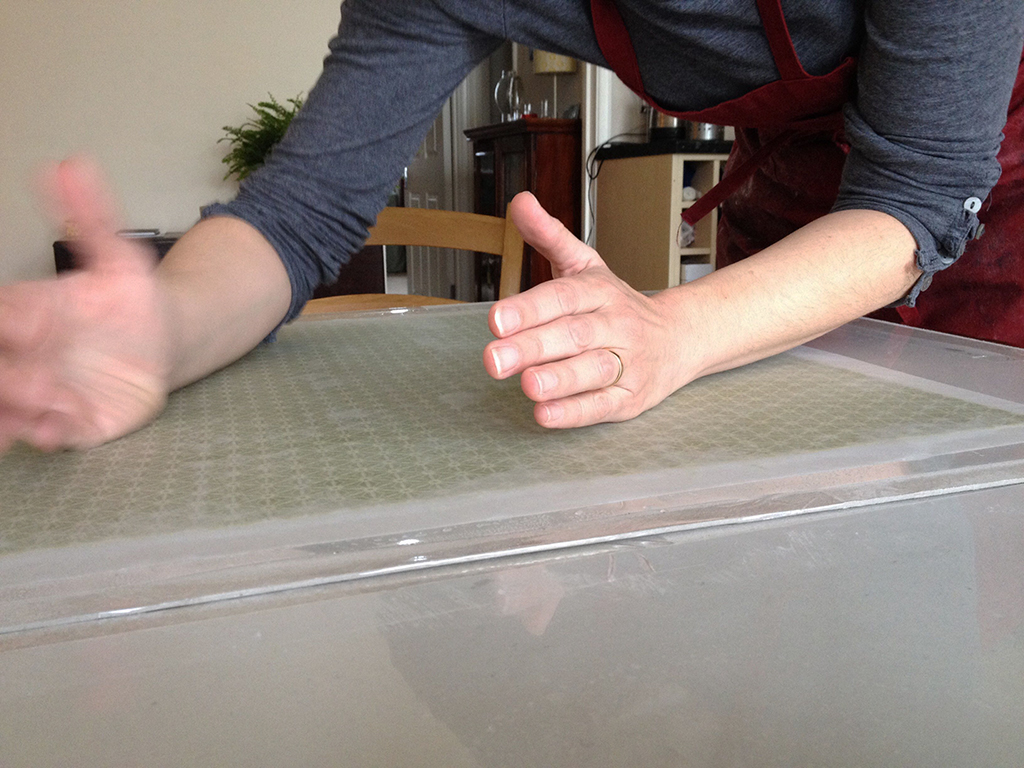
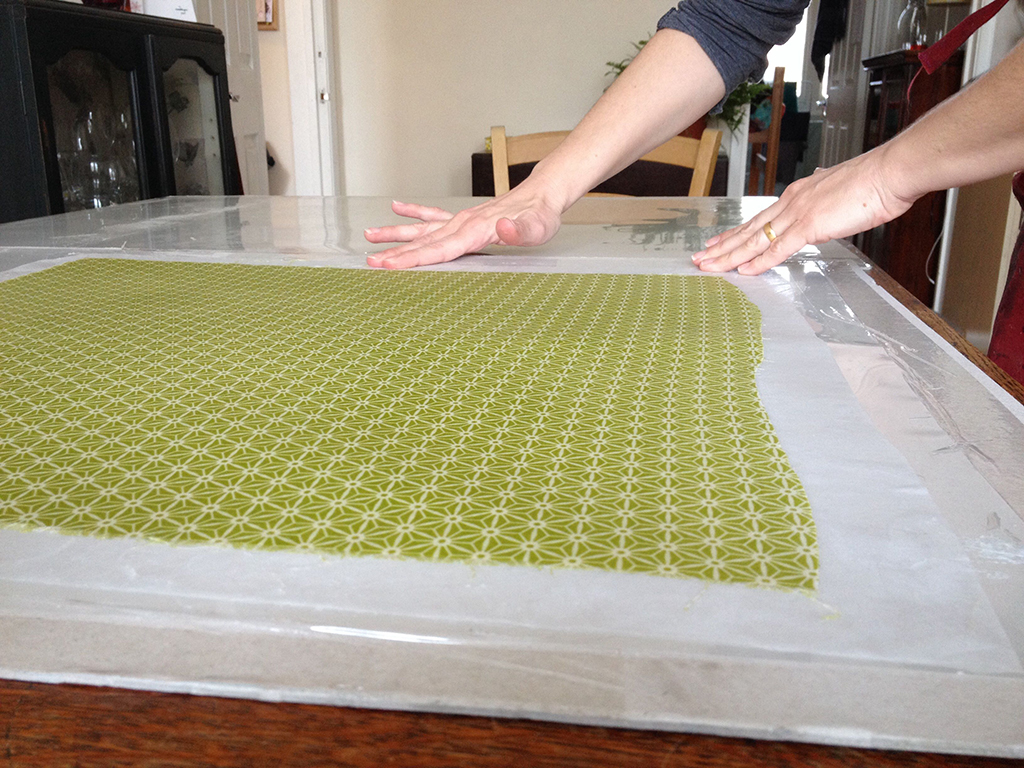
If you have a large wide brush, you can use it to smooth the paper onto the cloth. I gently use the sides of my hands. I am not moving or repositioning at this stage, just smoothing everything out.
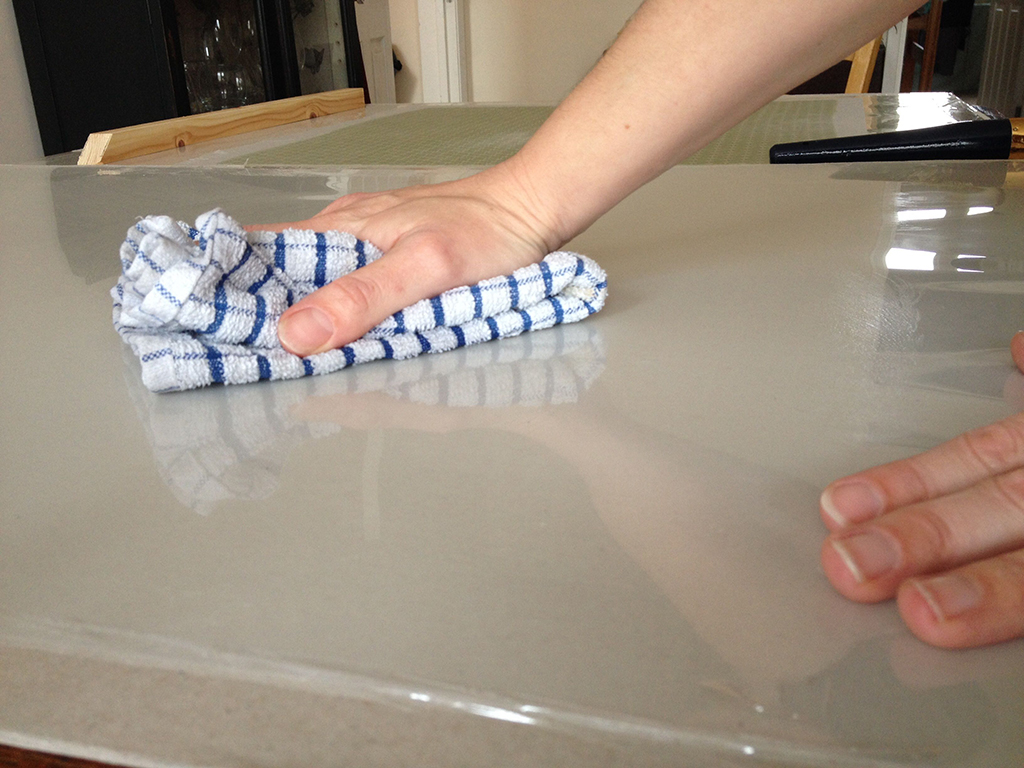
It’s dish towel time! A rolled up dishtowel may not be a traditional bookbinding tool, but it is the best thing for this job. Repeatedly bang that towel with a straight up and down motion all over that sheet, making good contact everywhere. If it looks like there are areas that need a bit more attention, I go back with my stipple brush and give it to them. Beware damaging the paper here, if you see fibers tearing away or wrinkling occurring, use less pressure and be careful of your angle.

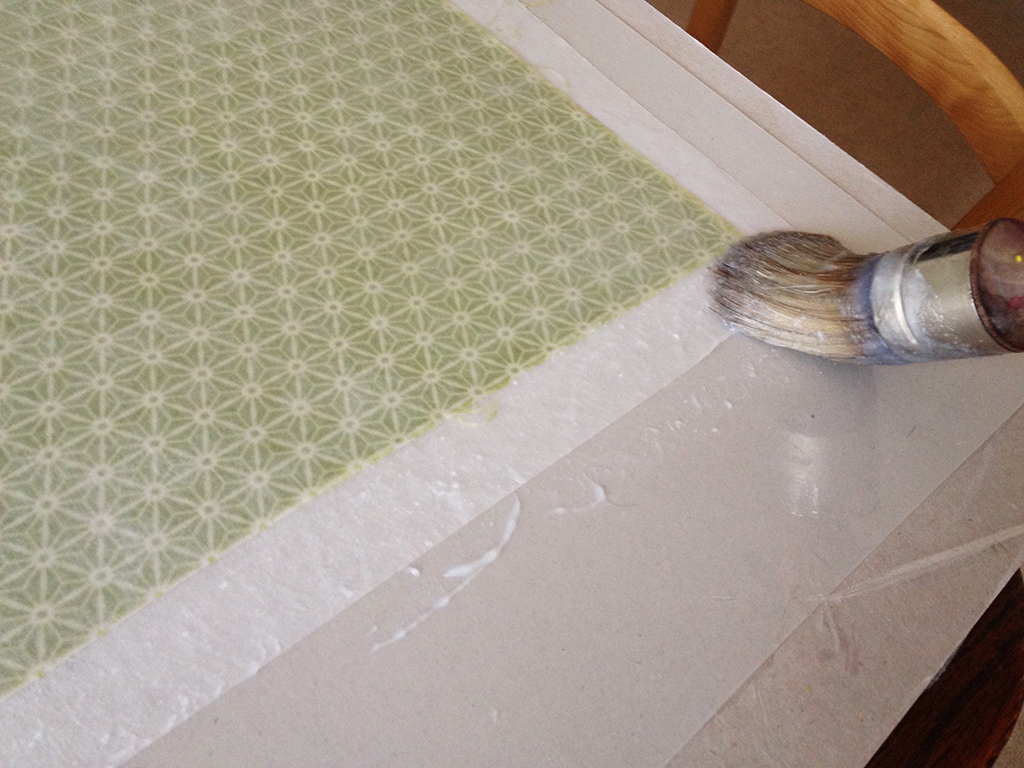
With your paste brush, paste the edges where the paper extends beyond the cloth. Do NOT put paste on the cloth areas.
Clean off the surface of the board you used when you applied paste to your large sheet of paper.
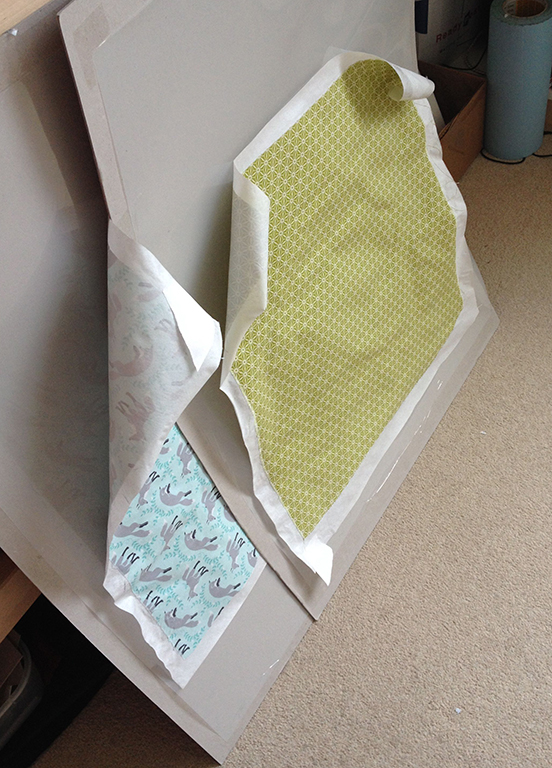
Pick up your soggy sheet of bookcloth. . .
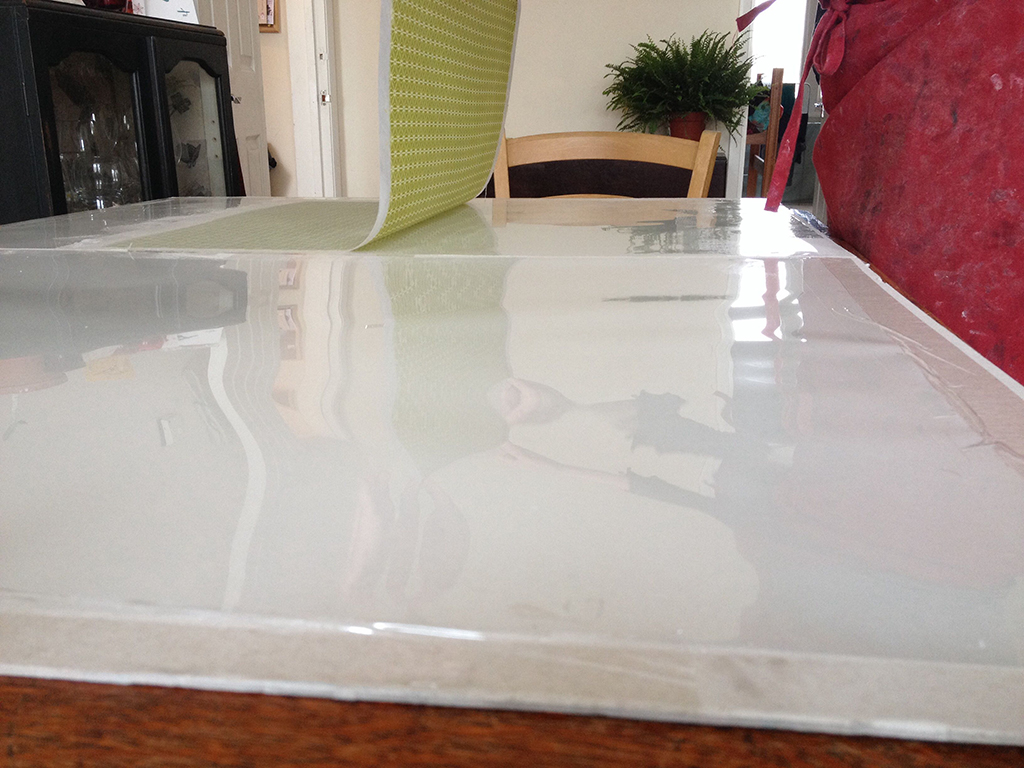
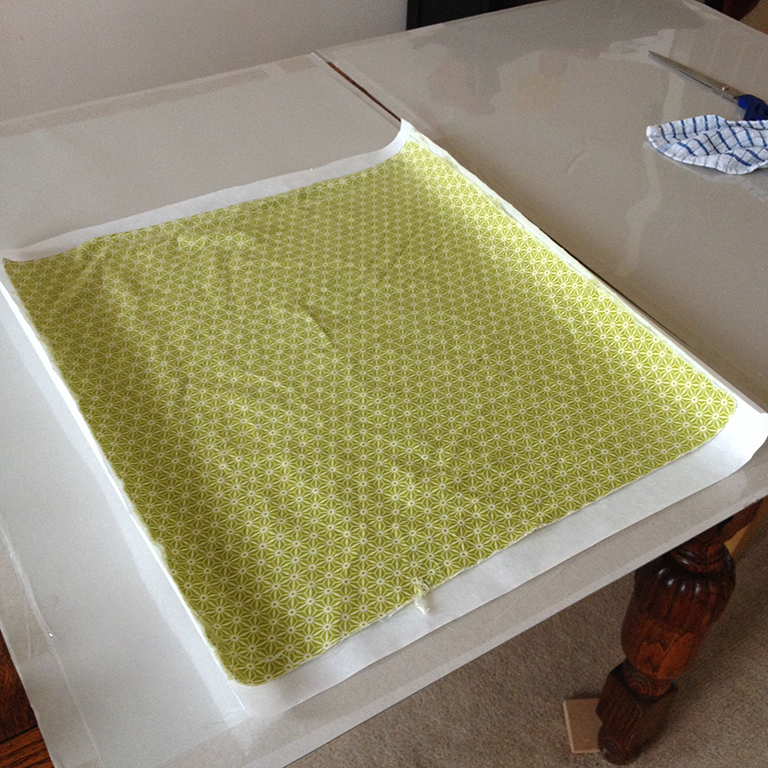
. . . and drape it down onto the clean board, this time with the cloth-side UP.
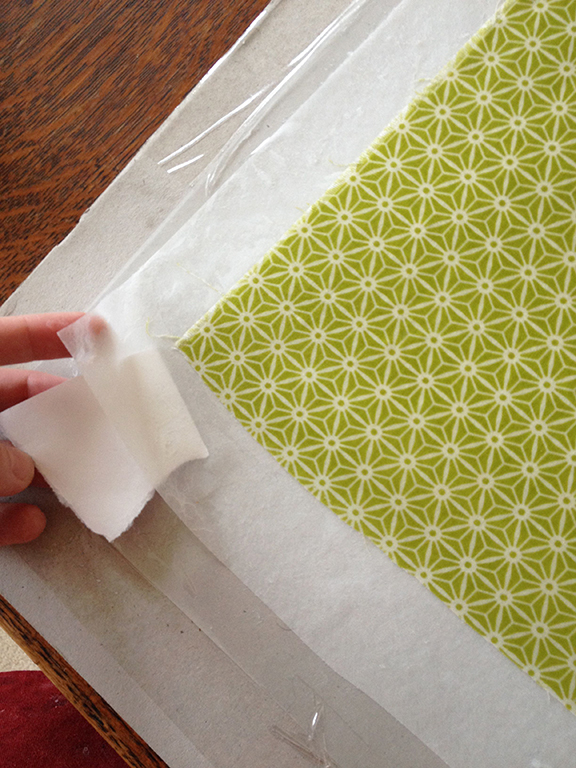
Use your fingers to smoosh the pasted edges onto the board.
Rip a small piece of scrap paper and insert it at a corner. This will help you take the cloth off tomorrow.
Stand the board up and let the bookcloth dry overnight.
Repeat! Once you’ve got your paste mixed up, you are ready to go, so I usually make four or five sheets at a time. It is helpful to have a number of boards so that you can keep on going.
The next morning, you may find that your cloth is falling off the board on its own, or you may have to coax it off with a tearing knife or letter opener.
Trim the edges off the cloth, and it is ready to use!
That was fun, right? Maybe you want to do it again and again and again like I do?
Or perhaps you want to drink mulled wine and start talking to your family again. Ok, me too. Happy Holidays from Big Jump Press!
60 comments on “Put down that mulled wine immediately. We are making bookcloth today.”
Leave a reply to Big Jump Press Cancel reply


How excellent!! Now….to get some boards or something so that I can play 🙂
I’ve always wondered how to do this.
Have a fabulous festive season xx
Great!! I am so glad I have answered a lingering question! Happy holidays!
Really grateful for the paste recipes and instructions, it’s the best I have ever seen.
I take it that it’s going to be the same with rice starch?
Yes, it should be just the same, although the timing might be different. Glad this is helpful!
Sawah!! Merry, merry Christmas! I love your blog, even though I don’t have time to give anything a try. But I do worry about that laptop.
I hope this is a wonderful season for you and Ben. I’m so glad you’ve landed in the lap of happiness.
Hope to see you soon –
Deborah
Merry Christmas Deborah! I miss you!! Thank you for reading my book blog, one day perhaps we can get together for some book making fun. Xxxxxxx love to everyone!
Wonderful and clear instructions, and you make it look like so much fun!! I will pass this along to my students. Merry Christmas, Mercedes
Thanks Mercedes! I hope they enjoy it as much as I do.
I will send my students to your blog to learn everything I planned to teach next semester. If they have questions they can come find me in my office watching episodes of Battlestar Gallactica. xxx joe
Ha! Yes, do that. And then let’s talk about the cylons.
Not to get too technical but does it matter if your fat quarter is pfd (prepared for dyeing) or not? Thanks for the great two-in-one post – wheat paste and bookcloth. Happy Holidays.
Hi Larry, I don’t actually know, I haven’t encountered that before. I imagine it will be fine, but the best way to find out is to give it a try. And if you do, let me know what happens! Best wishes!
This is fascinating, thanks so much. I hope this is not a stupid question, but I’ll ask it anyway 🙂 I’ve seen some crafty books recommend using decoupage glue like Royal Coat (http://www.plaidonline.com/royal-coat-decoupage-finishes/109/product.htm) to bind the fabric and the paper, basically with the same process that you’re describing using the wheat paste. Would you consider that an acceptable alternative?
Hi there! No, I would be very wary of using something like this, firstly and most importantly because it is not archival and there is no telling how it will behave over time, and secondly because I suspect that it would dry quite quickly, which might cause you a number of problems. I would stick with paste (har har) which has a long and tested history of doing the job well. Best wishes!
Ah have looked again and see is acid free, but I would still work with paste. If you are curious, however, why not give it a try? Best way forward is to do a test!
I’ve been waiting for an article like this for ages! Can’t wait to try it out. Thanks!
So glad I could help! Good luck!
Jacob, perhaps this warrants a bookcloth day in Sydney’s west or Austinmer?
That sounds like fun (what a nerd) I’ve even got a few big sheets of Kozo paper!
Time to break em out!!!
Another wonderfully planned, executed, presented, and recorded procedure. I would surely try this if I had not already bound a book back there sometime in the Twentieth Century. I vote yes for tenure.
Thanks Glenn! I won’t force you to make book cloth if you show me some ceramic heads based on a recent photo. Merry Christmas ho ho ho!
Looking to give this a try but one important question…
Where is the recipe for mulled wine?
Ha! I
am shopping right this minute for a dumbed down version of this one! http://www.jamieoliver.com/recipes/recipe/jamie-s-mulled-wine
Mmmmmmm
Wow , this is a comprehensive ‘how to’ post that I must try. Nowhere round here to get wheat starch but I’ll search for it. Is that the same stuff to add to paint or dyes to make paste papers with? I’ve always wanted to do that to but have never been quite clear what to use. Choosing from some great fabrics or even using your own dyed cottons opens up so many possibilities for covers. Thanks Sarah.
Hi Lesley! I am glad you enjoyed the post! I am not sure if it is the same stuff, I would try searching for wheat starch or rice starch online, I found exactly what I’ve been using here. Good luck!
Love this clear demonstration. Thank you. I especially love the shot of your laptop poised on the edge of your work space…very familiar…
Thanks Carol! Yes, I do bad things to laptops. My last one died taking a dive, so it is pretty surprising that I can still behave like this. But that said, this computer is on its last legs no matter what I do.
This is awesome and by far the clearest presentation on this subject I’ve seen. and.. It has battlestar. As I said, Awesome 🙂
Ha, Thanks Eleni! Best wishes for the New Year!
Hey Sarah
Great post + instructions. On the plexi/perspex I found this place that cuts to size http://www.sheetplastics.co.uk/index.php?route=common/home and was wondering what thickness you would recommend?
Also found this for the wheat starch that looks quite good price http://shop.waiyeehong.com/food-ingredients/cooking-ingredients-condiments/flour-batter-breadcrumbs/wheat-starch
Now to find some fat quarters I like 🙂
Thnaks for showing us in such detail how to do this
Linda
Hi Linda, Sorry for the delay in this reply! I think four to six mm perspex is just right for this, you are looking for something that isn’t going to bow or bend, and that thickness should do the trick. Best wishes and good luck!
Sarah
Thank you – looking forward to giving it a go
Addendum: I think the shipping makes the link I gave more expensive that the souschef link you gave boo to not obvious extra costs 😦
Hi
I am an old bookbinder and have always made my cloth using a dry hot press, some miso paper and a binder of thin plastic. Have you heard of this method? I bet it is not the most long lasting or archival.
Hi Mary Ellen! Thanks for your message. Yes, I have heard of something like this method, but haven’t tried it yet. I’ll be teaching at Wells College this summer, where I know there is dry mount press, so maybe I will give it a whirl! Maybe it isn’t as long lasting or archival, but I’d be interested to do it anyway. Best wishes,
Sarah
Thank you so much for this lovely tutorial! I’ve been tasked with restoring my grandmother’s 70-year-old cookbook. The cover is missing, and so I am recasing the entire book, as chronicled over on my (very) new blog. Thank you again!
Ariel
Hi Ariel! I am so glad you found it useful! Good luck with your grandmothers cook book! I will have a look at your blog to see how it turned out! Best wishes, Sarah
Thanks for putting together this tutorial (and to the reference to “Japanese Bookbinding”)!
I first tried this general process using another well-known web tutorial which is based on using PVA. I didn’t know any better and had some success, but more failures since PVA’s quick drying time is so unforgiving. Now a new world is open. Just did this yesterday. I’m a convert to wheat-based pastes! After scaling a brief learning curve, I got wonderful results. Now I can cater to my daughter’s hot-pink-o-philia when making her custom notebooks and journals.
Oh, and I also found that corrugated plastic (bought at my local art store) works great as a surface. The shallow ridges aren’t an issue at all – no indentations in paper or fabric.
Mitch
Hi Mitch, I am so glad it was helpful! And thanks for the corrugated plastic tip, that’s a great solution and I’ll pass it along. Best wishes and thanks so much for reading! Sarah
This is a lovely tutorial, though I see I am about a year late in reading it 🙂 Quick question though: How well would this work with a linen instead of 100% cotton cloth? I’m making a wedding scrapbook for a family member and her colors are “burlap and coral” (ugh) So I figure linen would be fine. Anyway, let me know your thoughts on that – I may just try it 🙂
Hi Jillian, So glad you liked the tutorial! Linen should work fine. When in doubt, do a small test to see how the material works out. Good luck! (Burlap and coral?) Thanks again for reading!
Sarah
Here in Asia, we have that same paste that goes for what is equivalent to 1 US Penny, for a small tube of it.
Anyway, the “Japanese” paper. Here it means something very light, like lantern paper. Is it like that?
Hi Mmina, so sorry for my long delay, we have a new baby over here and my online life is on hold. Yes, a lightweight paper made from Kozo or Gampi is best. I imagine that lantern paper is the same, but can’t be sure. Best wishes!
Sarah
A brilliant post! I wish I’d seen this before I tried to cover a book in silk. Thank you for sharing.
Can you tell me, does the glue smell once it has dried on a book cover? Your warning about the fridge rather rang warning bells!
Hi Sandie, so glad it was helpful! No, the paste does not smell at all once it has been used and it is dry. It’s only stale made paste that goes off. In a gross and repulsive way!
Hi! Very good-looking tutorial, I’ll have to give that paste recepie a try.
I have a question though; what happens to the bookcloth if it gets moist? For me (using.. Err.. Wallpaper paste) it usually lets go of the paper backing when I glue the cloth to put it on my book, so I end up partially with areas of just tissue paper stuck to my book covers and free-flying cloth being all silly. Cheers!
Hi there! hmmmm, I haven’t had that problem before so it might be (a) that wallpaper paste or (b) your cloth may be a synthetic material. I would make sure you are using 100% cotton cloth and perhaps try another paste recipe? Book cloth shouldn’t delaminate (come apart) from it’s paper packing if it is to be of any use, so something needs to change!
Hi! It’s some sort of English furniture cloth I got from the second hand department of my workplace, so it’s not very tightly woven and I haven’t got a clue what material it is (but it looks nice!); I’ll go get me some starch and give your recepie a try. Thanks!
Ahhh, good luck! Let me know what happens!
What a great post and so inspiring! I have been looking to do this for a long time, now I’m off to the fabric store. Thanks!
I am so glad that you found this useful! Good luck!
Made my first book cloth! Thank you so much for these excellent directions, especially regarding the paste. I ended up using “super-fine cake flour” because there was no “wheat starch” anywhere to be found here but from what I saw around the internets it’s pretty much the same. Do you know if there is a difference? Hopefully it will all work out the same!
I am so glad that you found the directions helpful! I have no idea what super fine cake flour is, but if it works it works!
Best wishes,
Sarah
As far as I’ve read, it’s a matter of how much protein is left in the flour. I can’t remember how much there usually was in cake flour but I found a chart -somewhere-. In archival works one wants to avoid the protein (gluten); some say it might rot if it’s too moist in the air, others say it might attract bugs who’ll eat into it and so forth. I -think- cake flour has a very low protein content though (to make fluffy cakes!).
I just found a supplier for Jin Shofu (a very pure wheat starch, used by most conservers I’ve come across) here in Sweden and has placed an order; it was fairly expensive though. Roughly $30 for 1 kilo. I’m just hoping it’ll solve my delamination problem, but that remains to be seen!
/Orwar
I LOVE this tutorial and have made several books from book cloth I’ve made now. I have one question for you though. I am making my wheat paste in a different method, using an archival wheat paste powder from the art store and water, but it seems to work fine. However when I try to use the book cloth to cover binder’s boards when I use a PVA + water mixture to attach book cloth to the covers the paper backing wants to separate from the fabric slightly. There never seems to be an issue once I get the cloth on, but it’s kind of difficult to work with it once the paper is trying to detach from the fabric. Any tips or suggestions? Thank you 🙂
Hi Amanda, sorry for my long delay in this reply! I’ve just moved from the UK to Alabama and daily life has been dominated with all kinds of moving details, immigration related stuff, trips to buy mops and dishes etc. You may have solved this problem by now, but if not I would suggest using another kind of paste. Some kinds of starch hold better than others. A lot of people swear by Aytex-P, for example.
Best of luck to you!
So many thanks for you guide!
I am glad it was helpful!