
Edition Binding 101
 I am often asked how long it takes me to make one book. It is an impossible question to answer and I often seem evasive or befuddled when I try. The first book in an edition takes a year, the second book takes a few days, the third, fourth, fifth, sixth all happen at the same time. I make a total of seventy five identical books in batches of ten to fifteen, often leaving them in mid-production for a few days. A series of a hundred small steps are all produced in batches; ten books are assembled from folded pages, ten spines are consolidated with glue, ten spine linings are cut to size and ten spine linings are applied, and so on and so on and so on. Despite the obvious sequential similarities, binding an edition is a different process than binding one book. It can take months instead of hours, and as a result, it is critical to remember every measurement and operation. This post is devoted to my Rules of Editioning.
Rule #1 Save every measurement
 If you are making seventy-five identical books, there is no reason to take the same measurements seventy-five times. Taking measurements is a painstakingly slow part of binding a book. I cut extra components for each mockup that I make and set them aside just in case that mockup is successful and I’ll need to replicate the measurements. Once I determine that a mockup is working well enough to be the final version of the binding, I label and keep master components and measurements.
When it comes time to produce a round of ten or fifteen books, I use these masters to cut all of the pieces. If I were to use an unlabeled extra piece from an earlier round of binding, there would be no way to know if it was cut slightly off square, or cut to a slightly different size. Any mistakes generated by a bad round of cuts could multiply if I used another of these pieces for a subsequent round of books. This would cost me hours of work and valuable materials.
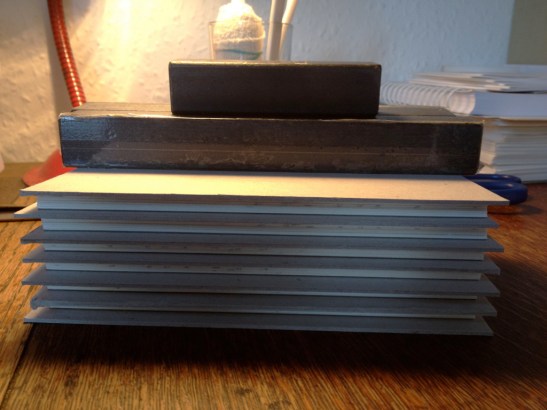
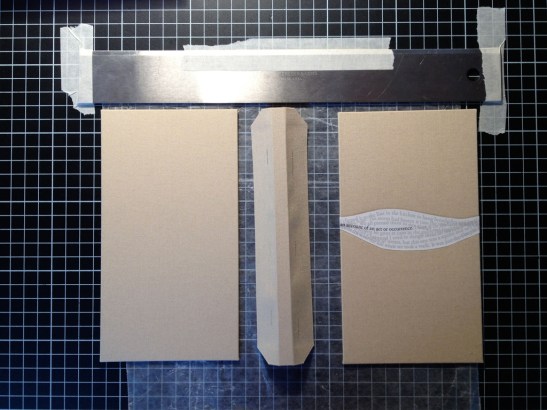
 When I am finished making a round of cuts, I label any extra materials that are cut correctly to one dimension so that I can find them easily when it is time to cut components again. Below, the two larger pieces of board are cut to the right width for the short walls of the slip cases, but the narrow cuts for the depth have yet to be made. I’ve marked them and I will make those cuts at a later date.

Rule #2 Create jigs that help you do simple things faster
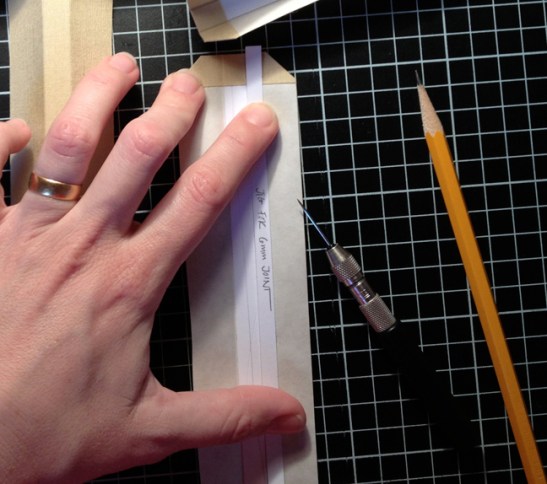 A jig is a simple tool that helps you repeat a measurement or a movement. Above you can see a 6mm strip of card stock that I am using to mark the joint width of the cases for Fond. By sliding this simple jig up to the spine piece and marking the edge in several places with a pin tool, I am creating a guide for the placement of the boards. Jigs can be as simple as a strip of metal or card stock, or complicated constructions to help you cover boards rapidly or do more complex actions. Below, I construct the spine pieces with some simple jigs, including a 3/4″ brass gauge from a hardware store to help me trim these spine pieces to size:
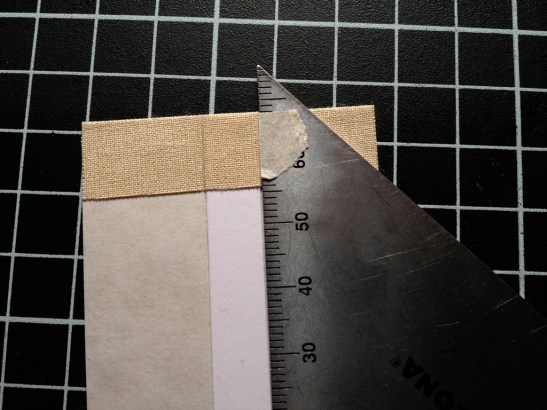
 A little masking tape on a triangle helps me cut miters in the right positions and at the right angle:
 Each of these spine pieces is trimmed and mitered in exactly the same way. If I had measured for each step of each piece, the process would have taken ten times as long.
 A heavy straight edge taped to my cutting mat enables me to attach the boards evenly and squarely. Having a physical stop for an action is easier and faster than using your eyes. Do you remember that first 6mm jig? The pencil marks on the spine piece below are marking the spot where I put pin marks using that jig. If I glue the boards directly onto those marks, they will be in just the right spot.
 The master board for the slip case also has marks indicating the starting and ending position of the labels that will be adhered into a recessed area. I can easily transfer these marks to boards for the edition.
 I keep all of these jigs as well as the master components in a safe place, separated from all of the debris of components, raw materials, and scraps that naturally pile up over the course of days of serious binding.

Rule #3 Do one step many times
 No matter how many times you’ve made a spine piece, cut a recessed area for a label, attached boards or gathered your folios together, the first time you do it after a break will take a little while while your hands remember exactly what to do. Treating an edition as an assembly line speeds things up astronomically. Every small step is replicated ten times before moving on to the next small step. Your hands get familiar with what you are doing, your brain can turn off, and the work gets done quickly.
It is unrealistic to expect to complete the entire 75 copies of the edition at once, so I break into batches of ten. This allows me to see some progress being made, to finish some books and get some satisfaction. It also prevents me from making any huge mistakes. If I do something wrong ten times, I can always go back and redo it without a great loss of time and materials. If I do it wrong seventy five times, I give up and decide to work at a bank.
Rule #4 Start organized, stay organized.
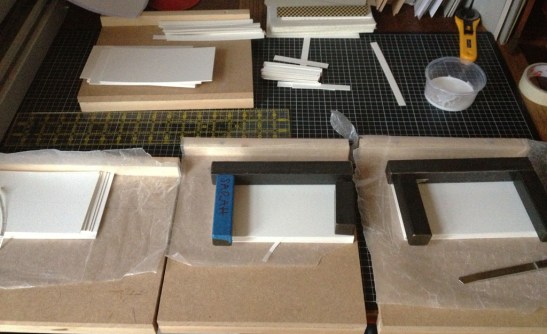
 Before I get started in the morning, I make sure my binding area is clean. I have all of the tools that I need (and no more than I need) set out and waiting. I have the components nearby, ready to go. I have scrap paper cut to a helpful size, I have my press boards ready, and I keep my coffee as far away as possible, often in another room.
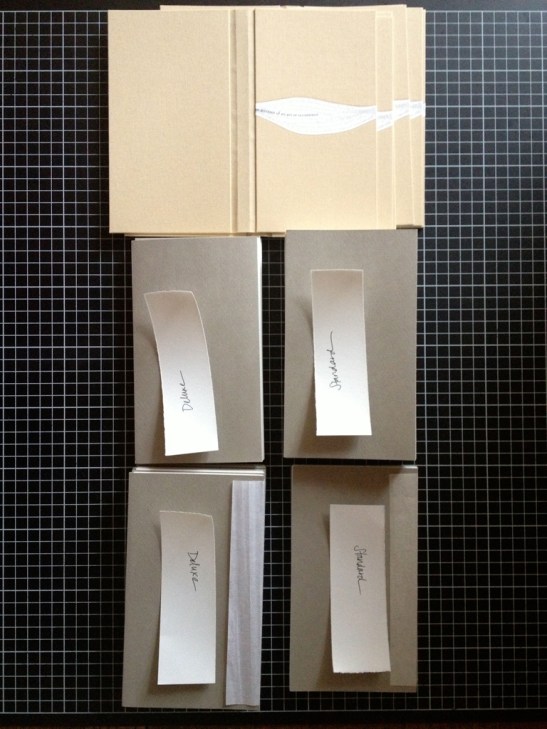 In cases where there are two parts to the edition (a standard version and a deluxe version, for example,) I keep them separate and am careful to label them. I keep them labeled no matter where they are or at what stage of production.
 When they are done (or close to done) I keep them sealed up and safe from calamity.
 I only number and sign the books once they are absolutely finished and inside their boxes. Then I check them for flaws, wrap them up carefully, and put them in a safe place where they will sit and wait to be shipped into the wide world.

18 comments on “Edition Binding 101”
Leave a comment


Thank you for this wonderful tutorial. I make about 10 books at a time and I learned some valuable steps.
I’m so glad it was helpful, Peggy! Happy binding!
Thank you! Your precess is very helpful.
Thanks, Donna. I am glad you find the post useful.
You are so organized! I like how you lay everything out before you start – and only what you need… good advice for many projects!
Your work is truly amazing. I bound a book one time, back about 1978. I still have nightmares from the experience.
I don’t believe that for a second, Glenn! By the way, I hear your Moon Winx sign is getting new life at the Druid City Brewing Co!
thank you sarah, this is extremely helpful. reminds me of my friend from warwick press saying “do NOT put that cup on your work table!” really nicely done.
Velma, I am so glad it is helpful! Yes, coffee has caused so many clumsy tragedies. I try so hard to make it impossible for me to destroy anything, but somehow I always find a way. Hence my new ‘separate room’ policy.
Thank you very much for the tutorial! I especially love your tape trick for cutting corners as well as your system for keeping jigs and masters separate. Very helpful; thanks again!
I am so glad it was helpful, Esther! As far as I am concerned, clotheslines can solve any organizational problem in the universe.
Sarah! You’re my hero. Would you mind if I printed this out to share with students interested in edition binding? One of my students found this post and suggested that would be useful, and I agree.
Of course, Tipps! I finally just ferried some of your books over here, by the way. Hope all is well!
Fabulous post. I especially endorse the idea of doing a batch of ten to start, because that’s the time when your body works out the best way to move through repetition and you can fine-tune the process in ways that working on mock-ups just can’t replicate — and the bit about making a mistake no more than ten times is especially true! Thanks so much.
Thanks! I am glad you liked the post. Ten works best for me, without a doubt. I tried to push it to fifteen once, but it just went so much more slowly that the whole process became disheartening.
Some excellent tips here, thank you 🙂
I now know only too well the advantages of writing down measurements to remember them…my niece asked for a leather journal with very specific dimensions… then later asked for another. Took me ages to find my notebook with the measurements in it. Now everything is noted down and kept together!
Yes, it took me a while to come up with a system after many long, agonising hours trying to retrace my steps!
and there’s nothing more annoying than half remembering how you did something 🙂