
How to make a collapsible punching trough
Happy Holidays! Who needs mulled wine and a pile of gifts when you’ve got a tub of PVA and a stack of binders board? This year, give yourself the gift of a collapsible punching trough. This post goes out to students from last week’s bookbinding course at Ink Spot Press. Look! I put instructions online, just as I promised! I learned to make these little gems from Ace Bookbinder Anna Embree when I was a grad student at The University of Alabama.
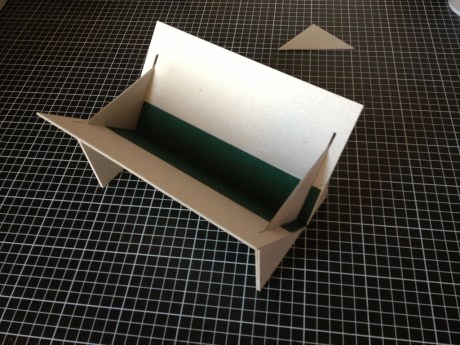
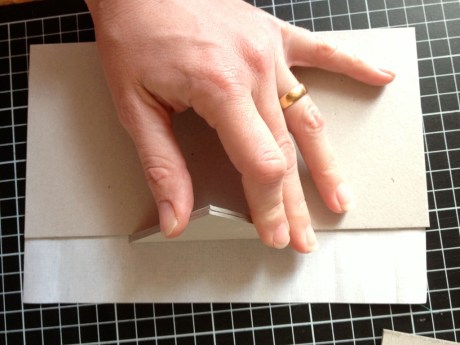
A punching trough is an invaluable tool which helps you to punch identical holes in multiple sections. I have a beautiful wooden one made for me by Bob Walp at Chester Creek Press,

but I also love my cheap collapsible troughs. They are easy to store and easy take to workshops that I teach. Best of all, they are easy to make.


Materials you will need:
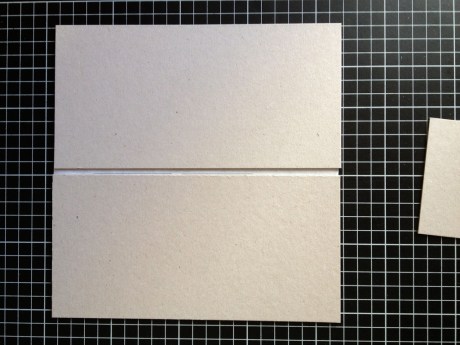
Two long rectangles of binder’s board (for example: 4″ x 8″)
Four identical small rectangles of binders board (for example: 3.5″ x 4″)
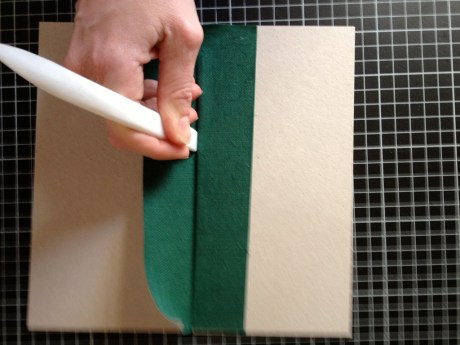
Two strips of bookcloth the height of the long boards (8″) and 4″ wide
Tools you will need:
Pencil
bone folder
ruler
Glue and a glue brush
sharp blade (olfa or x-acto)
awl

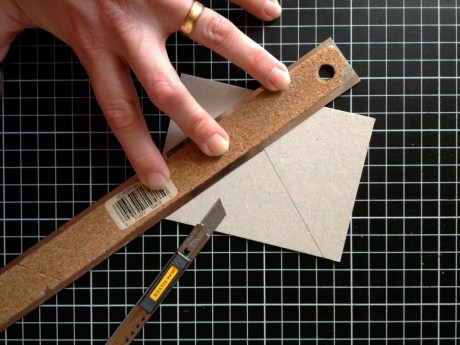
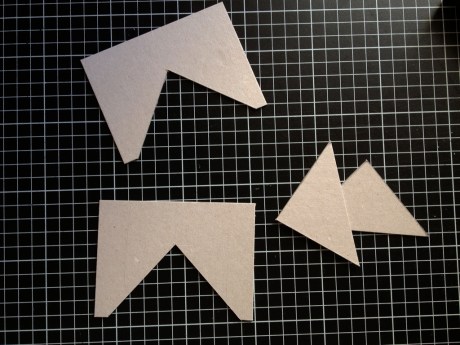
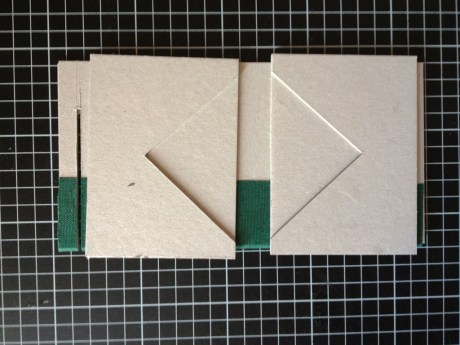
Draw a triangle in pencil on one of the four small rectangles. Start about a centimeter from the corner and have the point land somewhere over half-way to the other side. Like so:

Cut that triangle shape out.
Save the triangle so that one day you can make a tiny, triangular book.
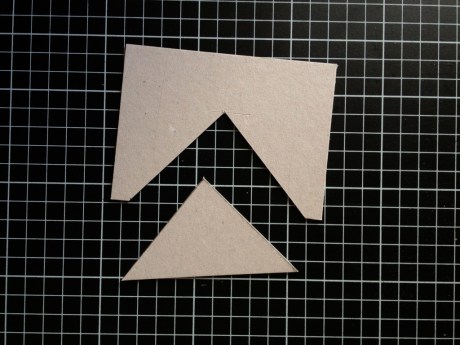
set that cut-up rectangle on top of another of your four rectangles and trace the triangle onto it. Now what do you suppose we do?
You guessed it. Cut that triangle out, too.
Now for some glue! Adhere a triangled rectangle to an uncompromised rectangle.

and repeat.
set both of those pieces aside under a weight and lets move on to the big guns. Glue out about an inch and a half strip along the edge of one of the boards.
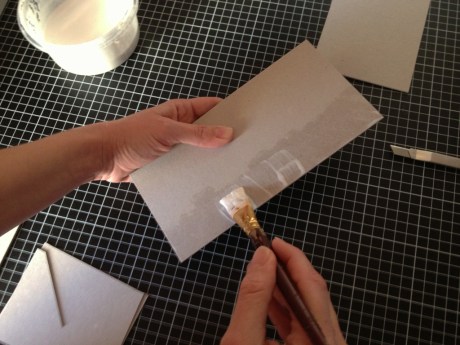
Adhere it to the the cloth like so:
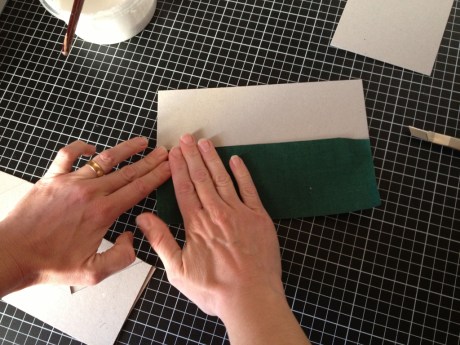
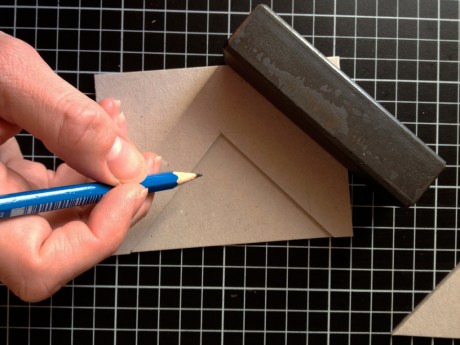
Now flip it over so that the board is on top and the cloth is paper-side up. Draw a line on the book cloth two board thicknesses away from the board. I used the two spare triangles as a gauge:
Glue out the edge of your second board and set it down to the outside of that line on the cloth.
Glue out the second piece of book cloth and use your bone folder to adhere it to one of the boards.

work quickly to get the the book cloth into the groove between the boards and then adhere the cloth to the second board.
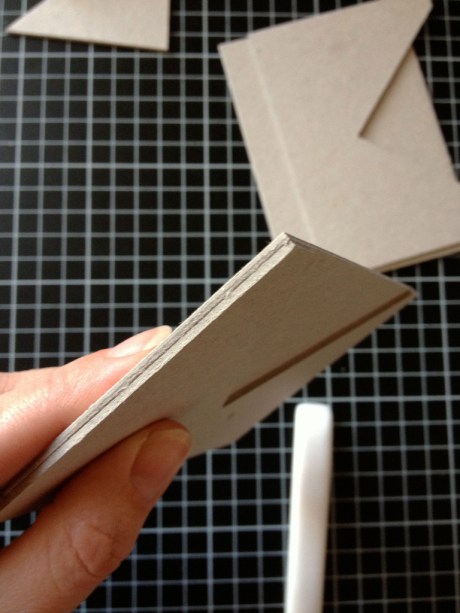
Now it is time to cut one-board-thickness-wide channels into both sides of the trough. The red arrows below indicate where these channels should go.

Score a line using your ruler and awl. This line should be parallel to the short side of your boards about 1cm from the edge. It should begin and end about an inch from either side.
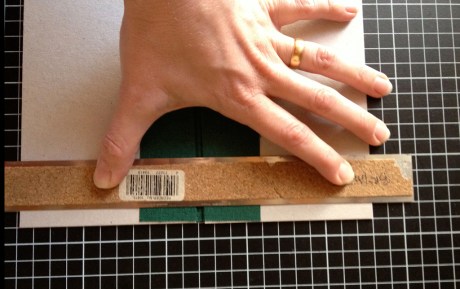
Using a scrap piece of board (maybe one of those handy triangles again) score a line exactly one board thickness to the inside from your last scored line.

Now cut that channel out.


Kaboom. You are now finished. I know, right? That happened so fast.

Now go have some mulled wine and show it to your friends and family. Don’t worry, it will fit in your bag just fine.
11 comments on “How to make a collapsible punching trough”
Leave a comment


Thank you. That is a great holiday present.
Peggy Seeger
Persimmon Paperworks
I am so glad it is helpful to you, Peggy! Enjoy!
agree with peggy, this is a lovely present. i’ve had one of these for years, and now actually have the instructions to make another!
Hooray! Make a dozen of them, Velma!
I learned to make this from the late, great Shereen LaPlantz many years ago. It was the first thing she taught her classes in her Three Year Book Class. Lovely memories from McKinleyville, CA, and of all the talented people I met through her. Thanks for the clear directions. Mine has become a bit ratty.
Hi MaryLu, I am so glad that these instructions took you back! Perhaps it’s time for a new trough to ring in 2013. Best wishes and happy holidays,
Sarah
I never tire of saying this: You is a GENU-mulled-WINE GENIE-US.
Great idea! I love this!
So glad you love it! Thanks!
I made this tonight! Thank you for taking the time to make this the tutorial. (:
Hi Sarah! I am so glad you found it useful! Punch, punch, punch!