
How to adjust the packing on a flatbed cylinder press
 The process of letterpress-printing is a relationship between two basic variables: How much ink is applied to your printing surface (type, lino block, plate, etc.) and how much force you used to press your paper against this surface. More briefly: Printing = Inking + Impression. You can be inking your type perfectly, but if your paper barely touches that type, the printed text will look gray and unconvincing. Conversely, you can have a perfect amount of impression, but without enough ink applied in the right way, your text will not print correctly. Knowing how to adjust the packing (the paper wrapped around the cylinder which determines the amount of impression) is as important as knowing how to ink a press.
Once I’ve inked a press, checked my roller height, and locked my type into the bed, the first proof of the day is simply a test to help me gauge the inking and impression. If I am in a shared shop, I start by printing on one sheet of thin paper. I never know who has been using the press before me. If they were printing on a delicate Japanese paper, the cylinder may be packed thickly to accommodate. If I then blundered in and tried to pull a first proof on a thick sheet of printmaking stock, I could destroy the soft, lead type in the bed of the press by hitting it with too much impression. Once I am sure that I am not going to kill any type with my thick paper, I can run it through the press. Let’s imagine now that I have done so, and my printed text looks awful.
To determine if my gray looking text is the result of poor inking, too little impression, or both, I start by running my finger over the printed type. Can I feel any impression at all? I flip it over to the backside and look at the sheet in the raking light. If I can’t see anything, I know I need more packing. (alternatively, if I can see everything, even the dots on the i’s, I know I need to remove packing.) I try again, this time running my sheet through with a piece of copy paper behind it. I continue to add sheets under my printmaking stock until I have achieved the amount of impression I deem appropriate for the project. I want to add this amount of paper underneath the drawsheet of the cylinder. (If the type is still gray, I know I also need to add more ink. But today is Impression Day here at the Big Jump Blog, so let’s stay focused.) I adjust my packing every day that I print. If you don’t know how (or can’t remember) then listen up, here is a helpful set of instructions, complete with pictures and a new scrabble word.
Move the cylinder into the middle of the bed. (If you start at either end you’ll get yourself into a muddle.)
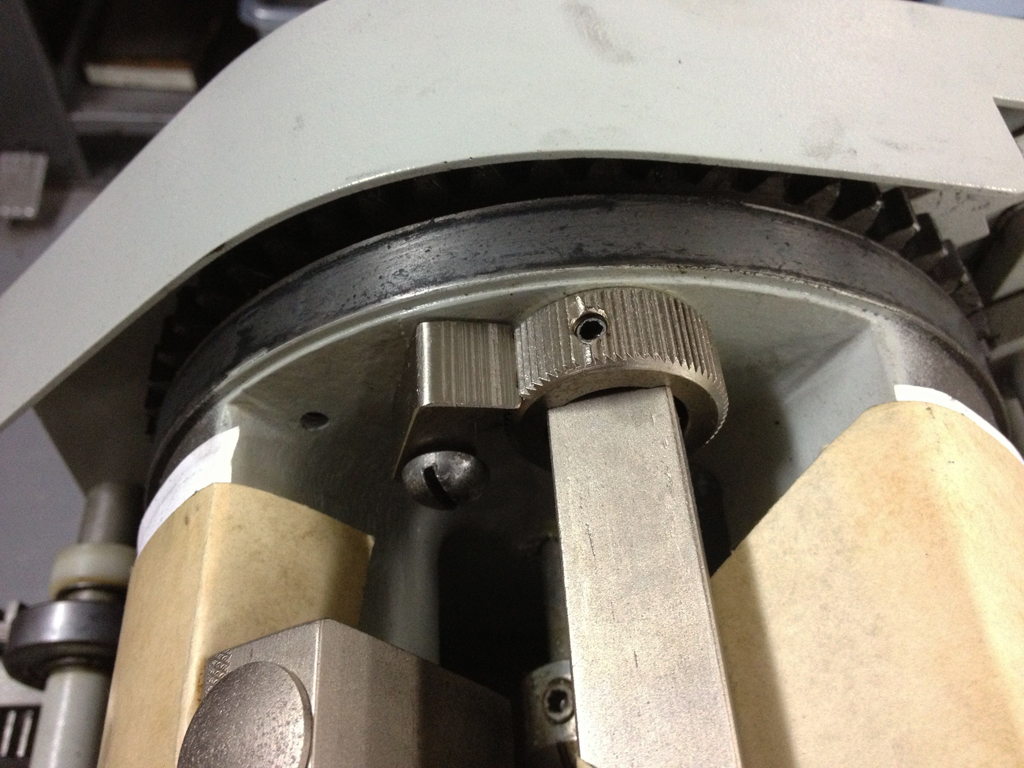
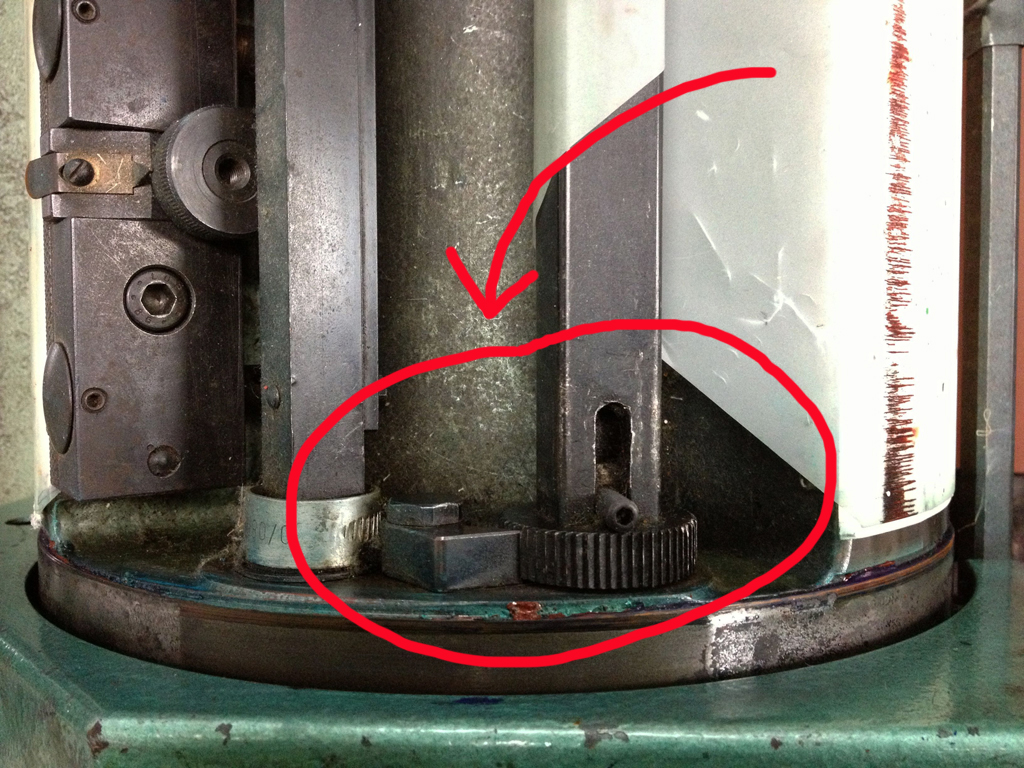
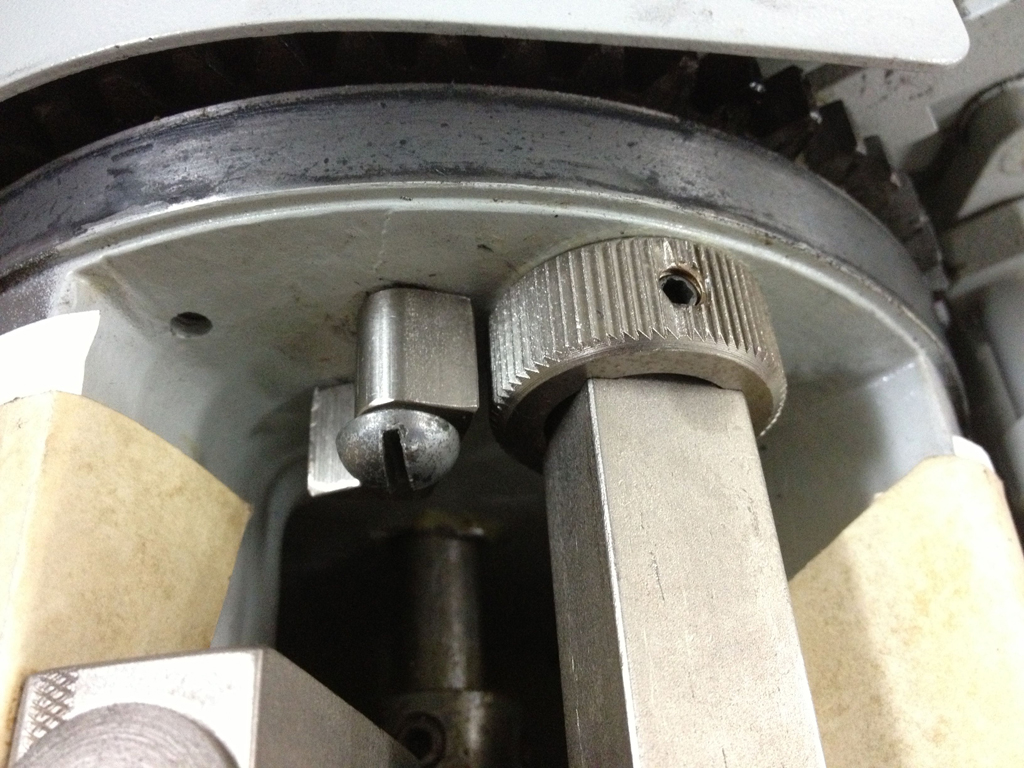
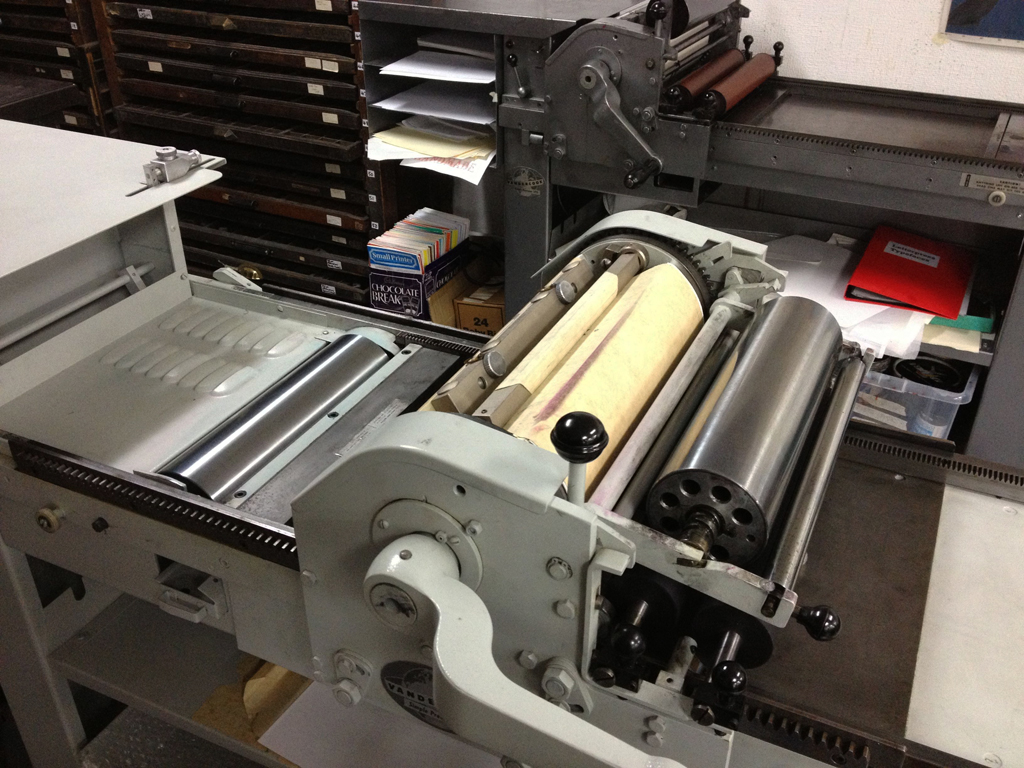 The drawsheet, the piece of paper that is pinned in place by the gripper bar and wraps around the cylinder to hold everything in place, is wrapped tightly around a rectangular bar attached to a ratchet gear. There is a little flipper thing trapping the gear in place. This little flipper do-dad is called a pawl. I give this new scrabble word to you in honor of my 100th post. (confetti!)
 I am working on a Vandercook SP-15 here, but a ratchet and pawl (confetti!) tightening system will be found on any flatbed cylinder press you please. Here it is on my new FAG-40.
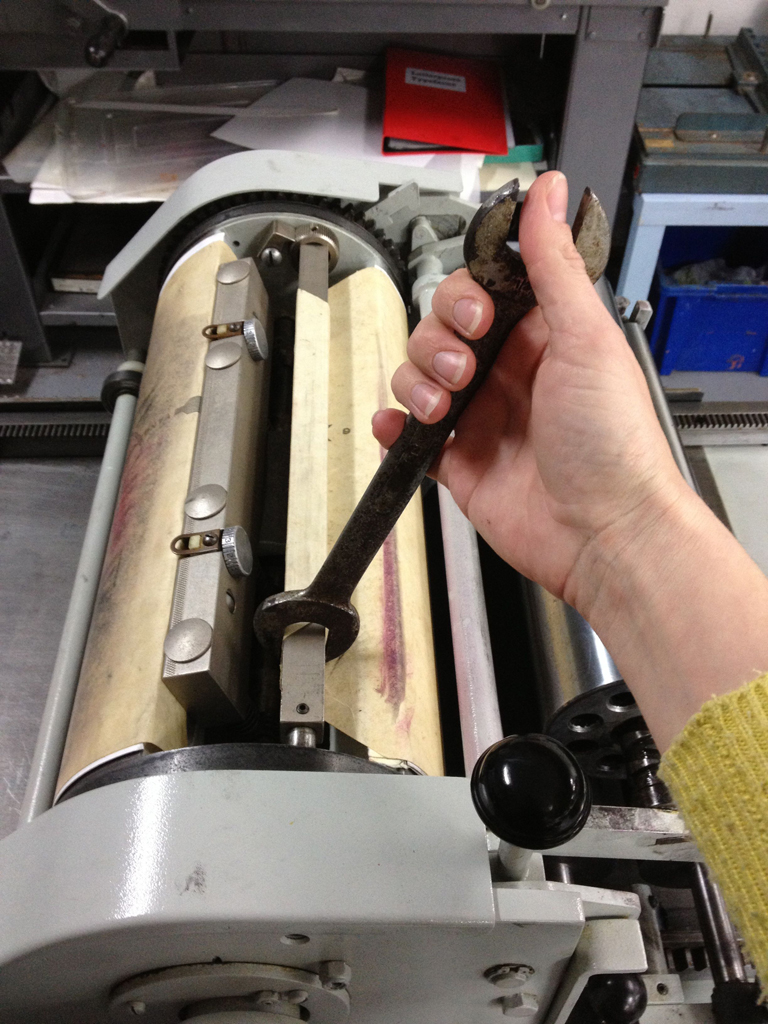
 Find a wrench, there should be one nearby, and pull the rectangular bar back so that the pawl (confetti!) can be unhitched from the ratchet gear. Some presses have these bits and pieces assembled in different ways, so you may find that you have to pull the bar in the opposite direction than I am pulling it below.
 (confetti!)
 Now unwrap the drawsheet from the bar.

 Once you’ve unwrapped the paper, you might see (as above) three holes along the bar. This press once had a narrow, removable strip of metal with little pegs on it that fit into these holes. It was used to pin the paper in place and help secure the drawsheet to the bar. You rarely see these bars now; they had a nasty habit of falling into the cylinder, forcing the printer on hand to spend ages fishing it out again. The paper does a fine job of holding itself in place all by itself, and so most of these extra metal strips have gone to Vandercook Heaven.
 Bring the cylinder back to the feedboard and unwrap all of the packing.
 Now, depending on your needs, you will either remove a sheet or two from under the drawsheet to decrease your impression, add a sheet to increase your impression, or change the worn-out sheets out for fresh, clean new packing to achieve an even impression instead of a blotchy, uneven one. If you need to add or switch out for new sheets of packing there is probably some packing waiting for you under the press somewhere, but have a look. If it looks like this:
 Get rid of it and cut yourself some new sheets of paper. Letterpress printing is like the Princess and the Pea. Even a tiny indentation will make a difference to your printing. Banged up packing (as above) will give you a faint ghost-of-projects-past (I know I am mixing my fiction metaphors here) on your own printed sheet. Make sure you cut fresh sheets to the size of the rest of the packing, the width of the cylinder. It is tempting just to use whatever paper is lying around of any size, but life is better when things are done right, especially in a shared shop.
 Now you are ready to put the fresh, new packing in under the drawsheet.
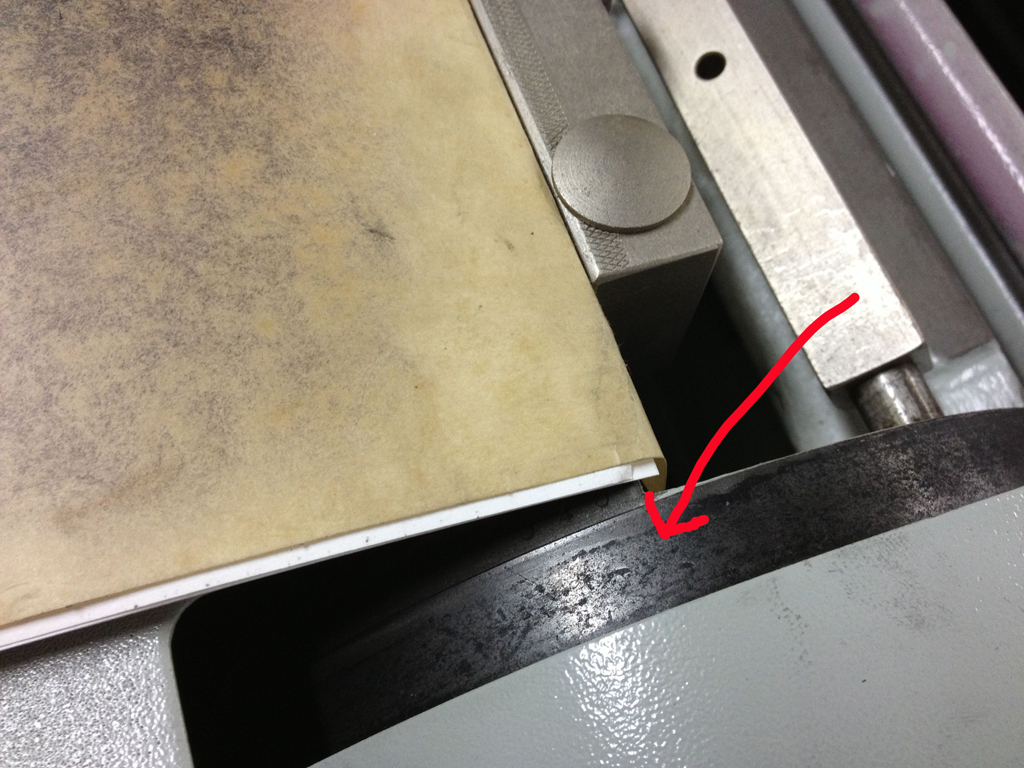
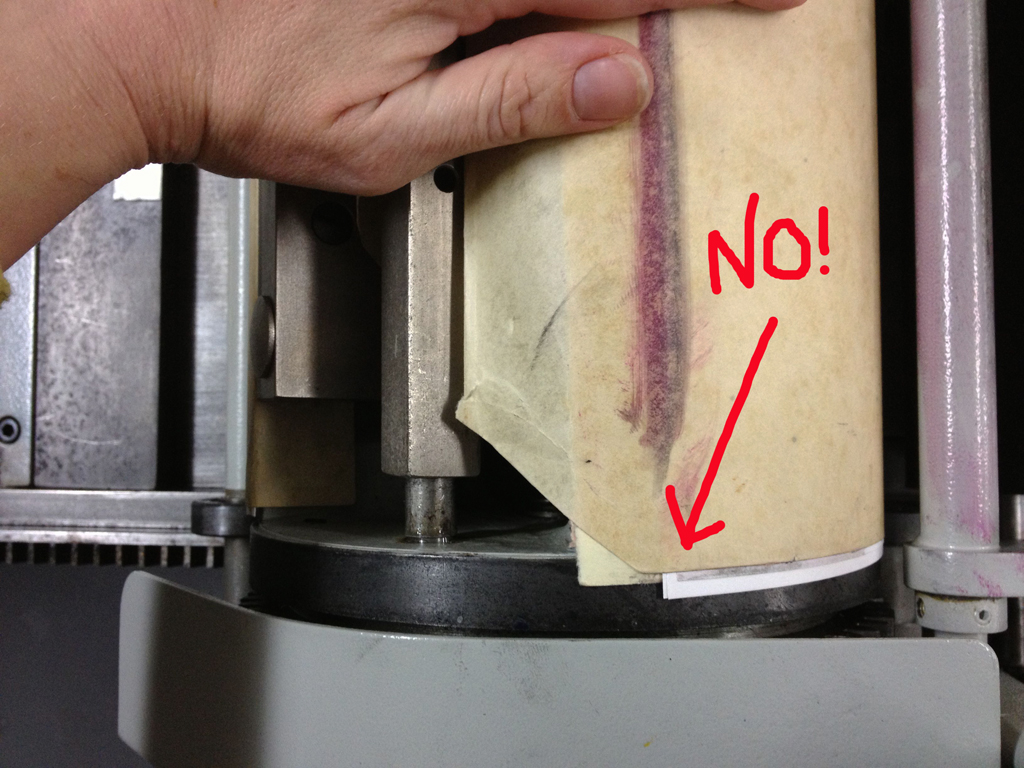
 Make sure all of your sheets of paper are bumped right up against the fold in the drawsheet and flip the drawsheet back. Before you bring the cylinder forward and wrap it with the new packing, keep in mind that you want to keep the packing from getting crooked and overlapping the bearings on either side:
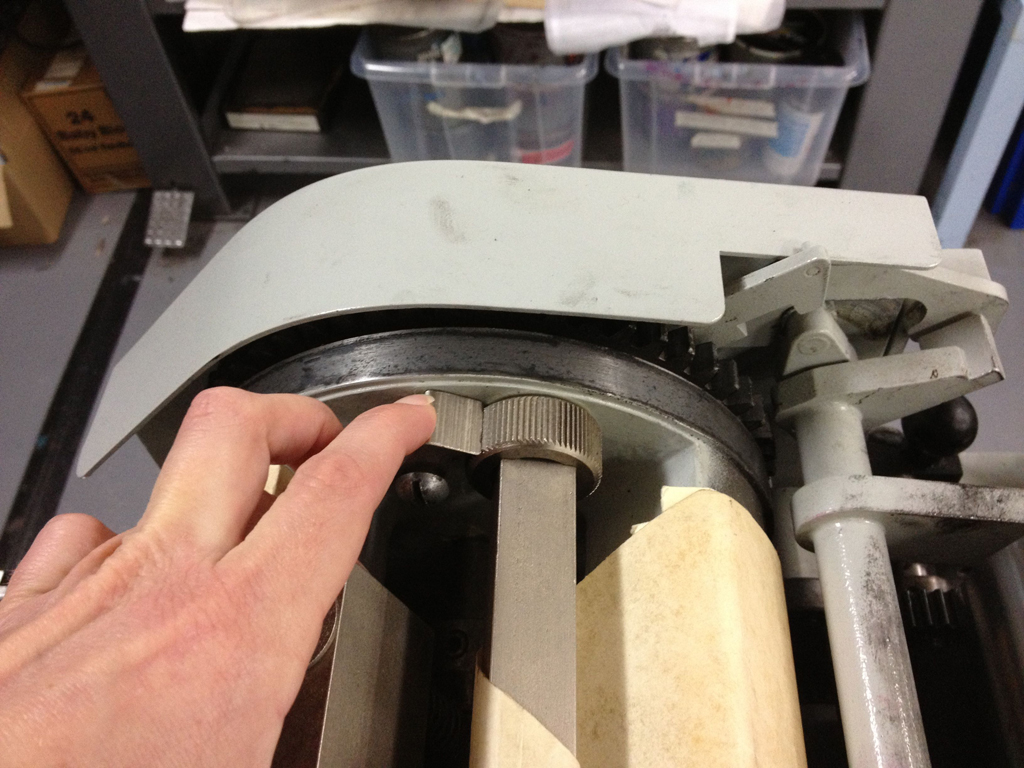
 Keep your hand tight against the drawsheet and bring the cylinder back to the middle of the bed.
 If things have gotten crooked:
 Then unwrap it and do it again. Wrap the drawsheet back around the bar and get ready to. . .
 flip the pawl (confetti!) back into place on the ratchet.
 Tighten that bad boy back up again. If you tighten it too much, you might rip the drawsheet, so take care. You want the drawsheet to be tight as a drum where it is suspended between the end of the cylinder and where it starts to wrap around the bar, but, as you might imagine, you don’t want it to be ripped in half.
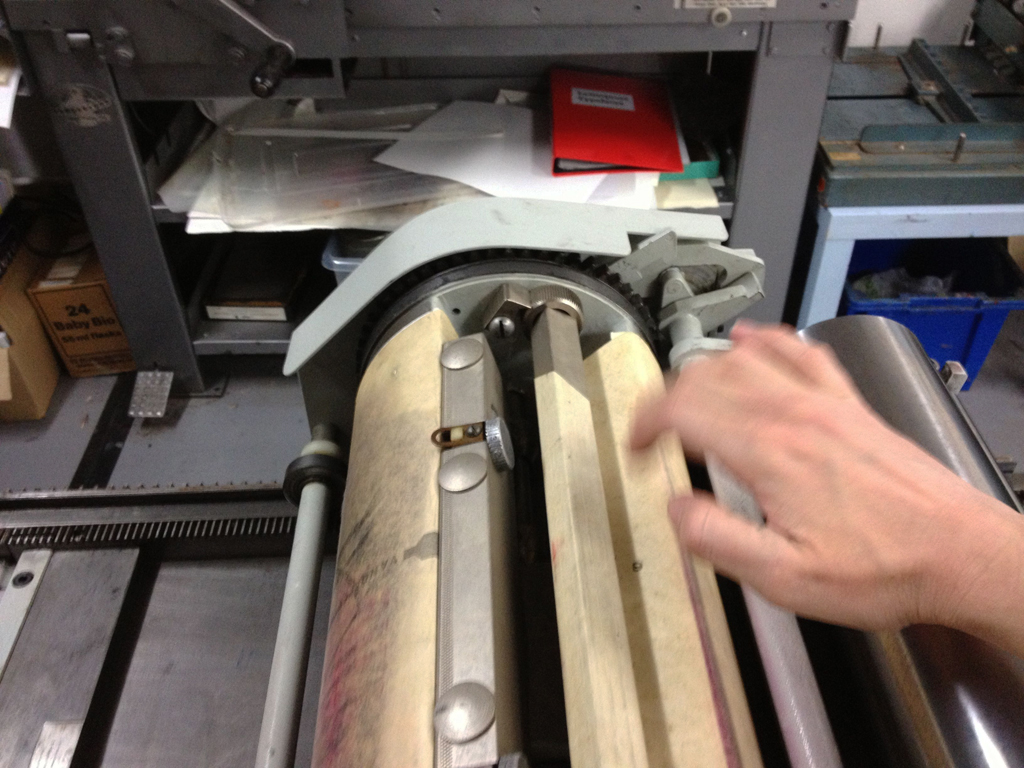
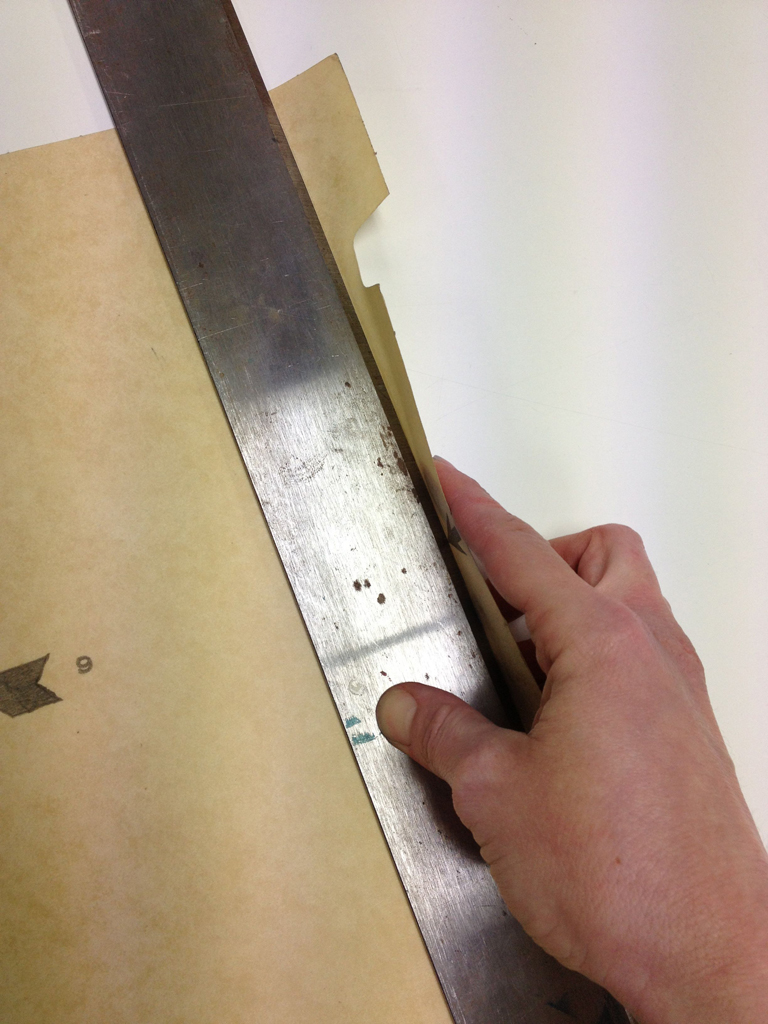
 Test it with your fingers to see if it sounds like a drum:
 And if it does, you are done! Unless. . .
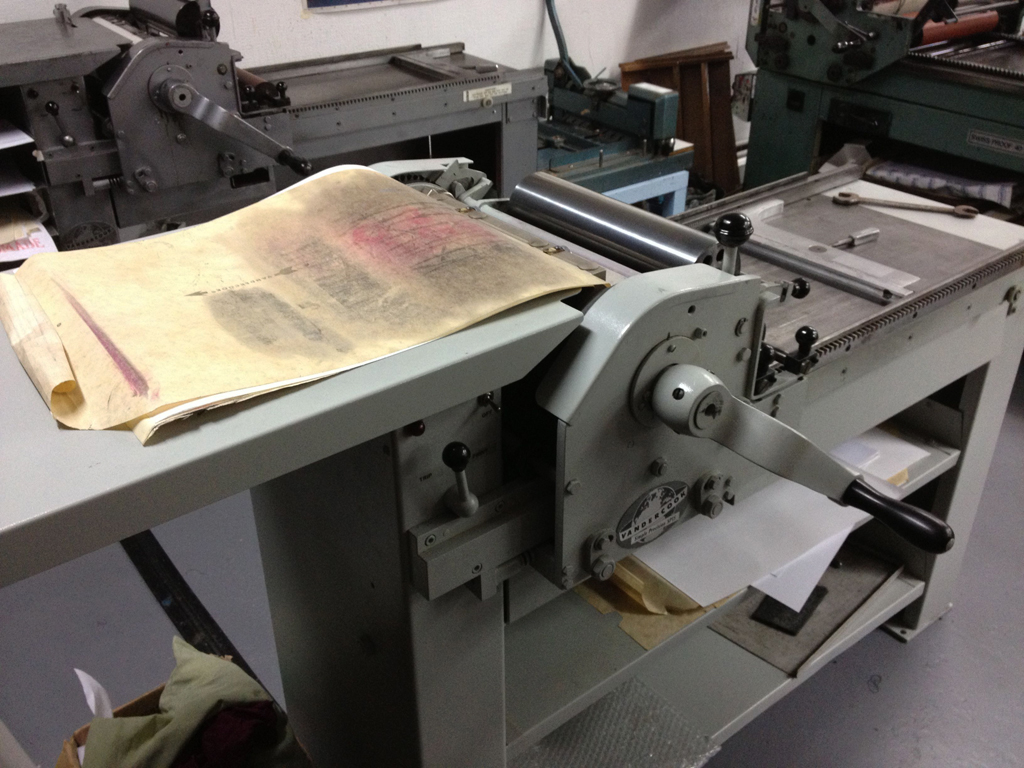
Your drawsheet is a worn out piece of garbage.
If your drawsheet is a worn out piece of garbage, changing the packing won’t be enough. You need to put on a fresh drawsheet. Do you have a flathead screwdriver? Yes? Great, then you are halfway there already. Once you’ve got all the packing loose and sitting on the feedboard, this is the easiest thing in the world, and pretty satisfying too.
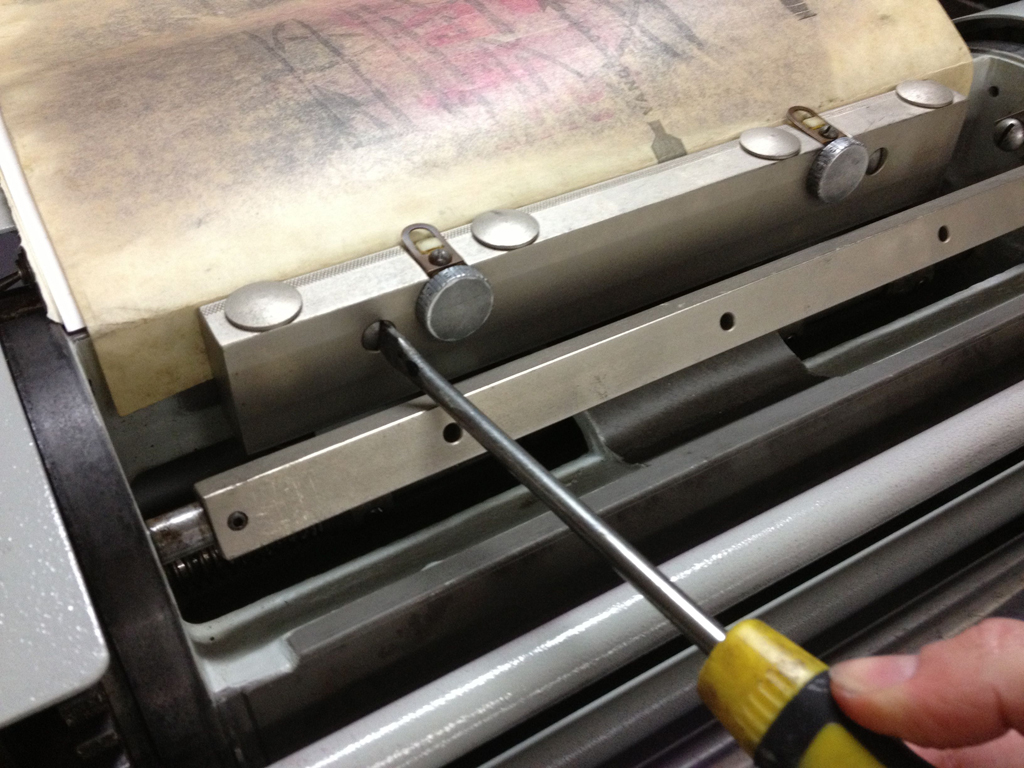
 Loosen the large screws on the gripper bar as below. You do not need to remove the gripper bar, so don’t take the screws all the way out and accidentally drop them into the cylinder.
 When these screws are loose (and by extension, the gripper bar is loose) the drawsheet should easily lift out:
 Look at that thing. Gross.
 Look around you. If you are lucky, there is a fresh drawsheet somewhere. They are often stored on one of the shelves in the press. I found one there, look:
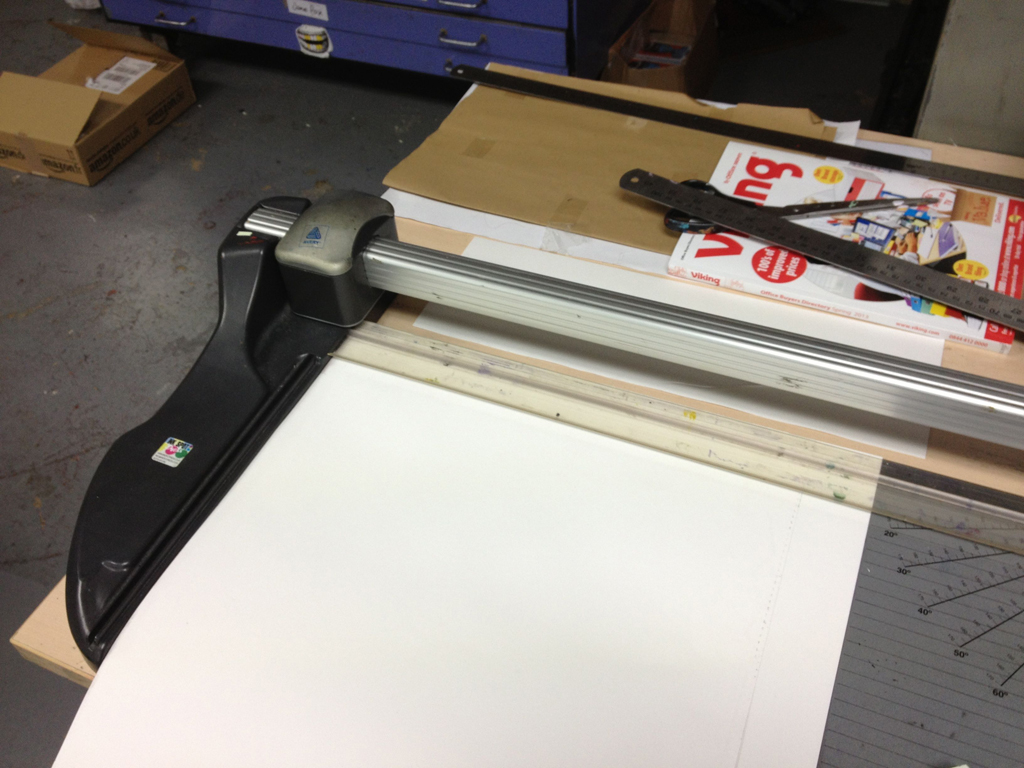
 If you can’t find one, don’t panic! You just need to cut a drawsheet for yourself. The vandercook oiled sheets (above) are lovely, but you can make a drawsheet out of almost anything. Acetate makes a great drawsheet in a shared shop (it is durable and easy to clean when someone has printed on the packing by accident.) Use the old drawsheet as a template, and cut a new one out of the material that you choose.
Once you’ve got your fresh drawsheet ready, score and fold a line about an inch or so away from the gripper side:
 Now go back to the press and slip this drawsheet into place. Make sure it is seated evenly, and then tighten it all up.

 Roll the cylinder into the middle of the bed and tighten the packing around the cylinder and you are done! Beautiful fresh packing, ready to give you a perfect impression.
 In a shared shop, common courtesy dictates that when you have finished printing, you should add or remove packing to restore the cylinder to how you found it. Do unto others blahdiblah.
So there it is, easy as pie. Now go print.
8 comments on “How to adjust the packing on a flatbed cylinder press”
Leave a comment


Tympan should never get in that state in the first place, but a very good well informed article – than you.
Thanks Andy,
You are right, it should never get in that state. But in a shared (often understaffed) shop you never know what you are going to find and so should be ready for anything! Glad you liked the post.
Thank you for this post! (and all of the “teaching” posts you do …) Your explanations and the many pictures are most helpful!
Thanks, Deborah! I am so glad this was helpful!
My studio just got its flatbed cylinder press running again, this is going to be really helpful for me as I start using it. Thank you!
Excellent! I am so glad I can be helpful, and congratulations on acquiring the press!
Great tutorial, I will use this here at Kinngait Studios in the Canadian Arctic!
Excellent! I am so glad it is useful to you. Hello to the Canadian Arctic from an American on the South Coast of the UK! Thank you, internet.